I’m celebrating the first anniversary of moving into my new studio. After spending thirteen years renting spaces in multi-use buildings I’m really enjoying being able to make myself at home in a space that is truly mine. Moving in has coincided with a rather big project, so it’s been a baptism of fire for the new space. It turns out that what I’ve needed all my working life is more magnetic tool holders.
Writing from home in the weird circumstances of a global pandemic and general widespread lockdown, I got to thinking about what it all means for museums.
There has been a move towards visitor access and engagement in recent years, with collections and their care taking a back seat (except in instances of decolonising collections). With this in mind it is interesting to wonder whether the physical museum and its objects may be secondary to the ideas that they represent. Many museums have gone online with their content to allow people to access them despite the closures, and Maria Balshaw, director of the Tate galleries, said in a piece in the Observer (25th May 2020) that they are reaching new audiences through online content. In John Armstrong’s The Intimate Philosophy of Art, which I have been reading again recently, he talks about the pleasure and freedom of looking at pictures without any pressure to respond. It’s tempting to ask if we even need museums and galleries at all, with internet access to so much of the world and technological advances, such as 3D printing that mean objects can be faithfully reproduced almost anywhere.
Clearly art is a fairly basic human need after shelter and food, as cave art testifies. During lockdown people have been creating their own art, such is the desire to make and see it. I’ve been enjoying Grayson’s Art Club on Channel 4 and seeing the works people have been sending in on different themes. The utter delight of those whose works have been chosen for the exhibition that will follow has been contagious (possibly a poor choice of word in the circumstances). What’s interesting is the perceived elevation in status of the pieces, or perhaps legitimisation or approval, by the fact that they will be displayed in a gallery as part of an exhibition.
If we consider the space itself, a museums or gallery is more than just the place where a collection is displayed. As well as having this aura of importance that can legitimise the objects inside, they are also public spaces that anyone can enter and use. With People use museums as performance spaces, celebration venues, meeting places, learning environments and safe spaces. As a parent of young children, I go to museums on rainy days with them; the large spaces, lifts, stairs, shops and cafes are generally what appeals to them and it means I can pass a chunk of the day without them bouncing off the walls at home. If I can glance at something beautiful or interesting in between times then that’s great. If I can get them to engage with something then I feel I’m winning. At the beginning of this lockdown, the prospect of my kids at home for months on end and no museums to visit was quite daunting. With the news that galleries can start opening in July, I feel cautious optimism that I will be able to go again, slightly sooner than expected.
In my line of work, the tangible authentic object is important. I strive to do my best by the painting and its creator, to preserve what is there and make it as presentable as I can, so that the original work of the artist can be seen and enjoyed. I am concerned with how the painting has been made and ensuring that it is structurally sound. I can’t help feeling that there is something special about seeing an original object. This passage from The Intimate Philosophy of Art particularly resonated with me:
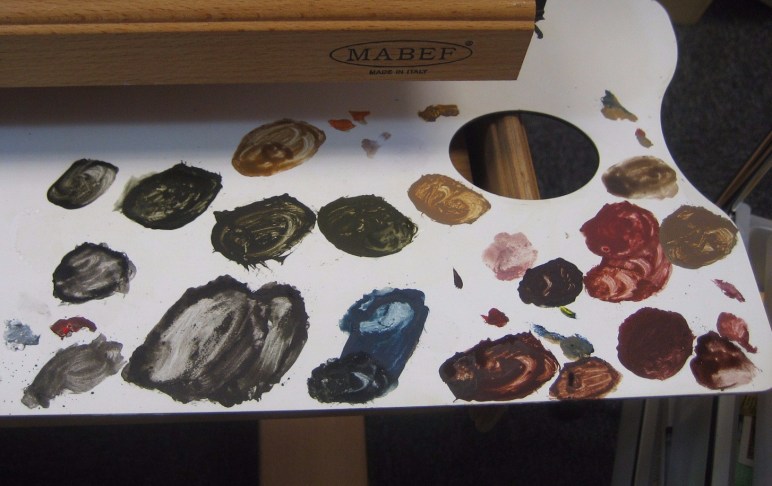
“…consider the fact – so obvious that it is almost embarrassing the labour it – that pictures are made by the manual application of paint to a flat surface. Paradoxically, copyists working in galleries (the Louvre seems to have more than any other) often attract keener attention than the original works whose superior merit their own devotion attests. What the copyist offers us – and what the finished work withholds – is acquaintance with the half lovely, half tedious process by which a painting comes to be made. We observe the gradual mixing… of colours on the palette; we enjoy the way the pigment is held on the bristles…; we take pleasure in the smell of oil and the hopeful areas of primed canvas… these are things we can enjoy sensually.”
– John Armstrong The Intimate Philosophy of Art, p. 26
I am more able than most people to contemplate artwork and come to greater appreciation at my own pace while I work on things in my studio. Obviously handling an artwork entails a level of risk, which means the particular privilege of seeing a work out of its frame isn’t feasibly available to the wider public. Attempts have been made in the past to democratise the experience by having viewing areas in conservation labs (there is one at the People’s History Museum) and conservation taking place on display (as with the Etty project at Manchester Art Gallery some years ago). It’s what I try to do through this blog.
There are things that you can’t fully appreciate from a picture in a book or on a screen, such as scale and texture. I remember seeing Dali’s The Persistence of Memory (you know the one: melty clocks) on a trip to MOMA in New York. For years I’d had the image on my wall as a teenager – an A1 poster bought from Athena on Market Street in Manchester – and was astonished to find that I had nearly passed it by in the flesh, so to speak, because it is so very small (Wikipedia tells me it’s 24 x 33cm). Astonished, but not disappointed. I think finding the details all there, so delicately rendered, made my appreciation for the work increase.
Lockdown has given everybody a new perspective on life, and a glimpse into what is for some people their everyday experience regardless of the pandemic. There are definitely things that we should keep from this experience of lockdown, including less focus on getting to a place and more opportunities to bring the place to people where they are. But I’m looking forward to being able to visit museums and galleries again when I can. I’ve got favourite places and favourite pictures that I like to see every now and then. When I’m in London, which is a lot less frequently than it used to be, I like to pop in to the National Gallery if I’ve got time, to say hello to Holbein’s Ambassadors and the Wilton Diptych. More locally, I like to check on paintings that I’ve worked on, just to make sure they’re still doing alright. Which works do you like to say ‘hi’ to when you’re passing?
It’s the start of another year, indeed another decade. It doesn’t feel like long enough since last January and once again it’s been a hectic start, with extra work coming in that I didn’t know about a few weeks ago. This time it will mean spending some time at National Museums Liverpool to help with a glut of loans. It will be ten years since I started my conservation career there, so it will be interesting to see how much has changed. I’ll also be at Gallery Oldham fairly regularly, continuing the conservation assessments and treatments after their flood. In between all these trips out I’ll be psyching myself up for structural treatments on some of the paintings in the studio.
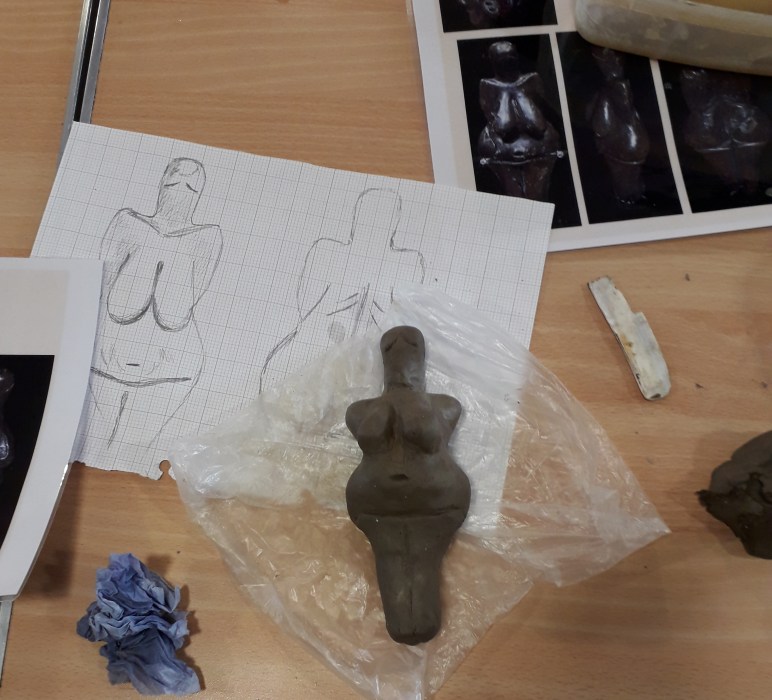
Away from the studio I’ve been doing some fun stuff. I spent an afternoon making a palaeolithic ‘Venus’ figurine as part of a Learning through Making session at Stockport Museum. It was a fascinating activity and appealed to my interest in materials and techniques in art, and my art history background. It was great fun smashing up bones with a stone to incorporate into the clay, especially since I spend so much time being careful not to break anything! And then contemplatively forming the clay into a female figure and reflecting on the process and what people making them 30,000 years ago might have had in mind. I’m not sure I had a great deal of insight to add to the discussion, as I am aware how much our own history and culture pervades our interpretations. I was reminded of the Van Meegeren forgeries of the 1930s, which at the time appeared so like Vermeer’s works that many people were fooled. But looking at them now, though there is a sense of stillness similar to Vermeer’s, they seem so obviously imbued with 1930s culture (particularly the heavy Marlene Dietrich eyelids) that it seems extraordinary that experts should have been taken in. Hindsight is 20/20 in the case of the Van Meegerens, but I think our 2020 vision (if you’ll excuse the terrible pun) makes it impossible for us to know for sure what the ‘Venus’ figures meant to the people who made them. What I think they do indicate is how essential the need for creative expression is, whether for spiritual reasons or aesthetic ones.
We can probably all agree that paint falling off a painting is a Bad Thing. Much of what I do for any painting that passes through my hands is to prevent it from happening by correcting canvas tension, framing it nicely and recommending where to hang it. But it still happens, and when it does it my job to try to rescue as much original material as I can and to prevent more from becoming lost. I consolidate.
There are different reasons the paint my become unstable. Chemical changes over time make paint films harden, become brittle, change colour. Sometimes there are strange interaction between layers in a painting that can cause delamination, where a top layer doesn’t adhere properly to the layer beneath, or perhaps the way the the canvas or board was prepared (or not) doesn’t help the paint to stay where it was put. Sometimes it is a problem related to the physical structure, with vibrations from travel or passing vehicles, impact (accidental or intentional), or environmental changes causing movement in the canvas or panel. Sometimes there is a disastrous event that leads to paint loss, such as a flood.
In the last couple of years I’ve worked on quite a number of works damaged by floods. These works were damaged in two separate incidents, one river-related and the other caused by an internal water leak. Easel paintings are susceptible to water damage because the materials in them are often hygroscopic (meaning they have an affinity for water and can take on and release water readily). Canvas fibres swell and contract, as they take in and lose moisture, causing the dimensions and tension to change, resulting in movement in the paint layers too. With movement in the canvas can come tearing, as the fibres break under the strain, which almost always involves some paint loss. In traditionally prepared canvas paintings the first layer applied to the canvas is called size, which is often water-soluble animal glue that slightly reduces the absorbency of the canvas and gives a good key for the next layers. On exposure to a lot of water this layer can be washed out, leaving the layers on top detached from the canvas and very vulnerable to loss.
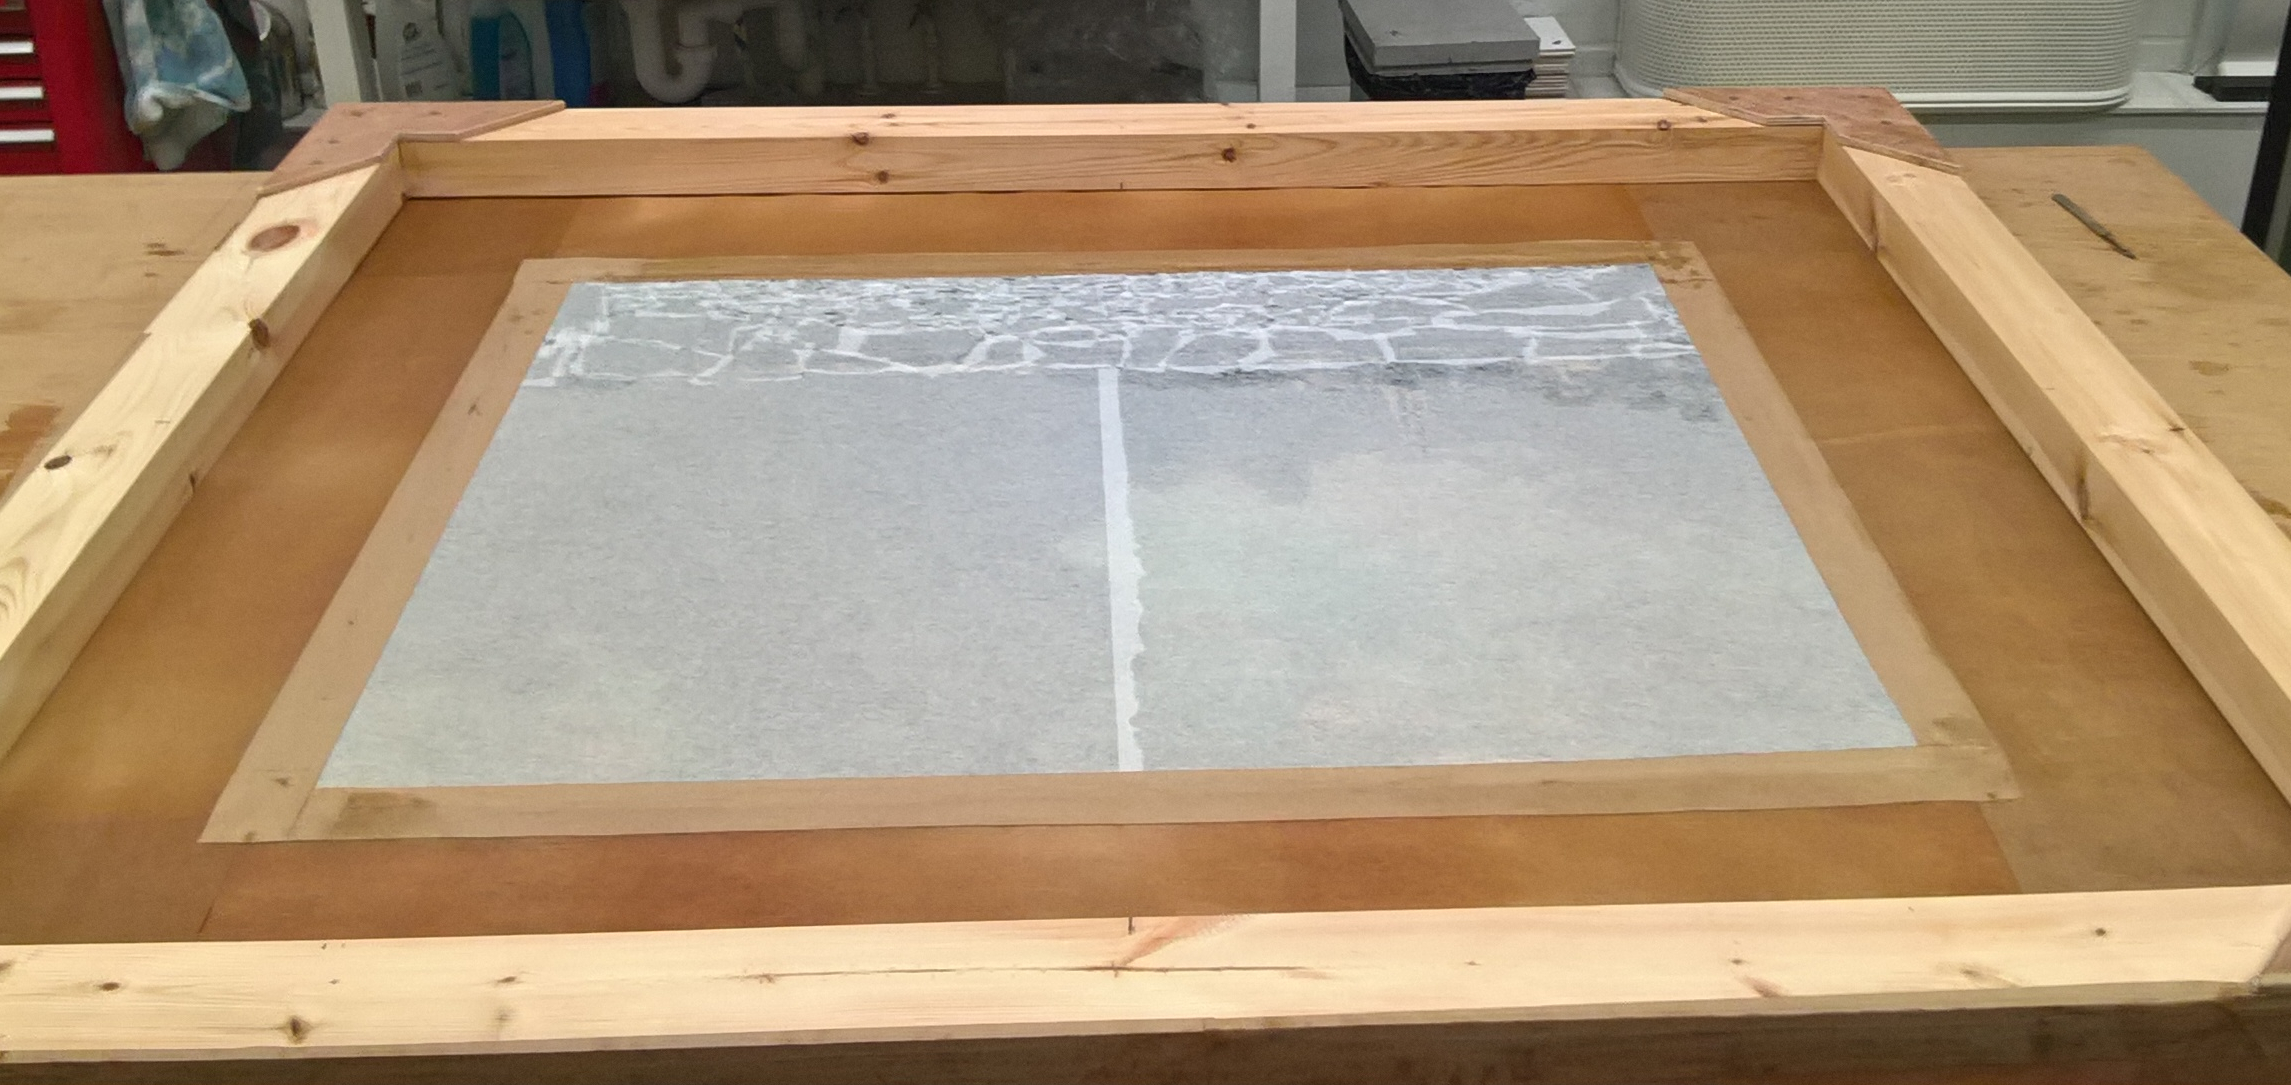
Sometimes canvases shrink as a result of flood damage, but the paint layer still occupies the same area. This can lead to tent cracks (so called because of their resemblance to old-fashioned ridge tents) where there is no longer room for the paint to go back where it had been. Sometimes it’s possible to stretch the canvas and make room for the tented paint in a process called prestretching. The photo below is from a painting I worked on a couple of years ago that had been flood damaged, causing the bottom third of the paint to become tented in horizontal bands. Kraft paper is attached to the painting and the loom (temporary wooden stretcher) while it is wet. As the paper dries it shrinks and pulls the canvas out evenly, allowing for consolidation to be carried out under tension.
Prestretching a water-damaged painting to allow the paint flakes to be laid down.
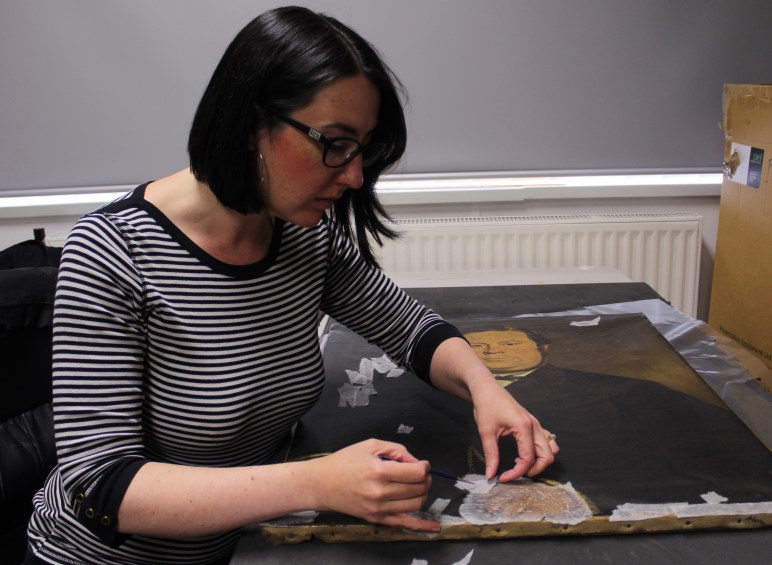
A painting that I’m working on at the moment has a lot of lifting paint, blisters and tears. As a first aid measure, another conservator applied adhesive through tissue to the flaking areas to hold the paint in place (this is called facing). The facing is useful and has done its job well, but it makes my task slightly more difficult as I can’t see exactly what I’m dealing with. So I’m painstakingly introducing adhesive with a small brush, before gently applying heat with a warm spatula to encourage the adhesive to penetrate under the paint flakes and help to get them to lie back down. The tissue and excess adhesive needs to be cleared from the surface, which then allows me to see what is going on and repeat my consolidation if necessary. When a painting is very badly damaged there is inevitably some paint loss that can be retouched at a later stage. No doubt this painting will inspire further blog posts as the treatment progresses.
Tenting paint covered in facing tissue.
After consolidation, during removal of the facing tissue
Icon’s Paintings Group Conference last year was called Wet Paint: Interactions between water and paintings, which dealt with new water-based methods of treating paintings, but also the destructive power of water. So it’s not just me thinking about this or having to deal with more flood-damaged paintings. With the changing climate I can only imagine that the number of paintings affected by flooding in the future will increase. It makes me even more determined to find more sustainable ways of working to help reduce my impact on the planet.
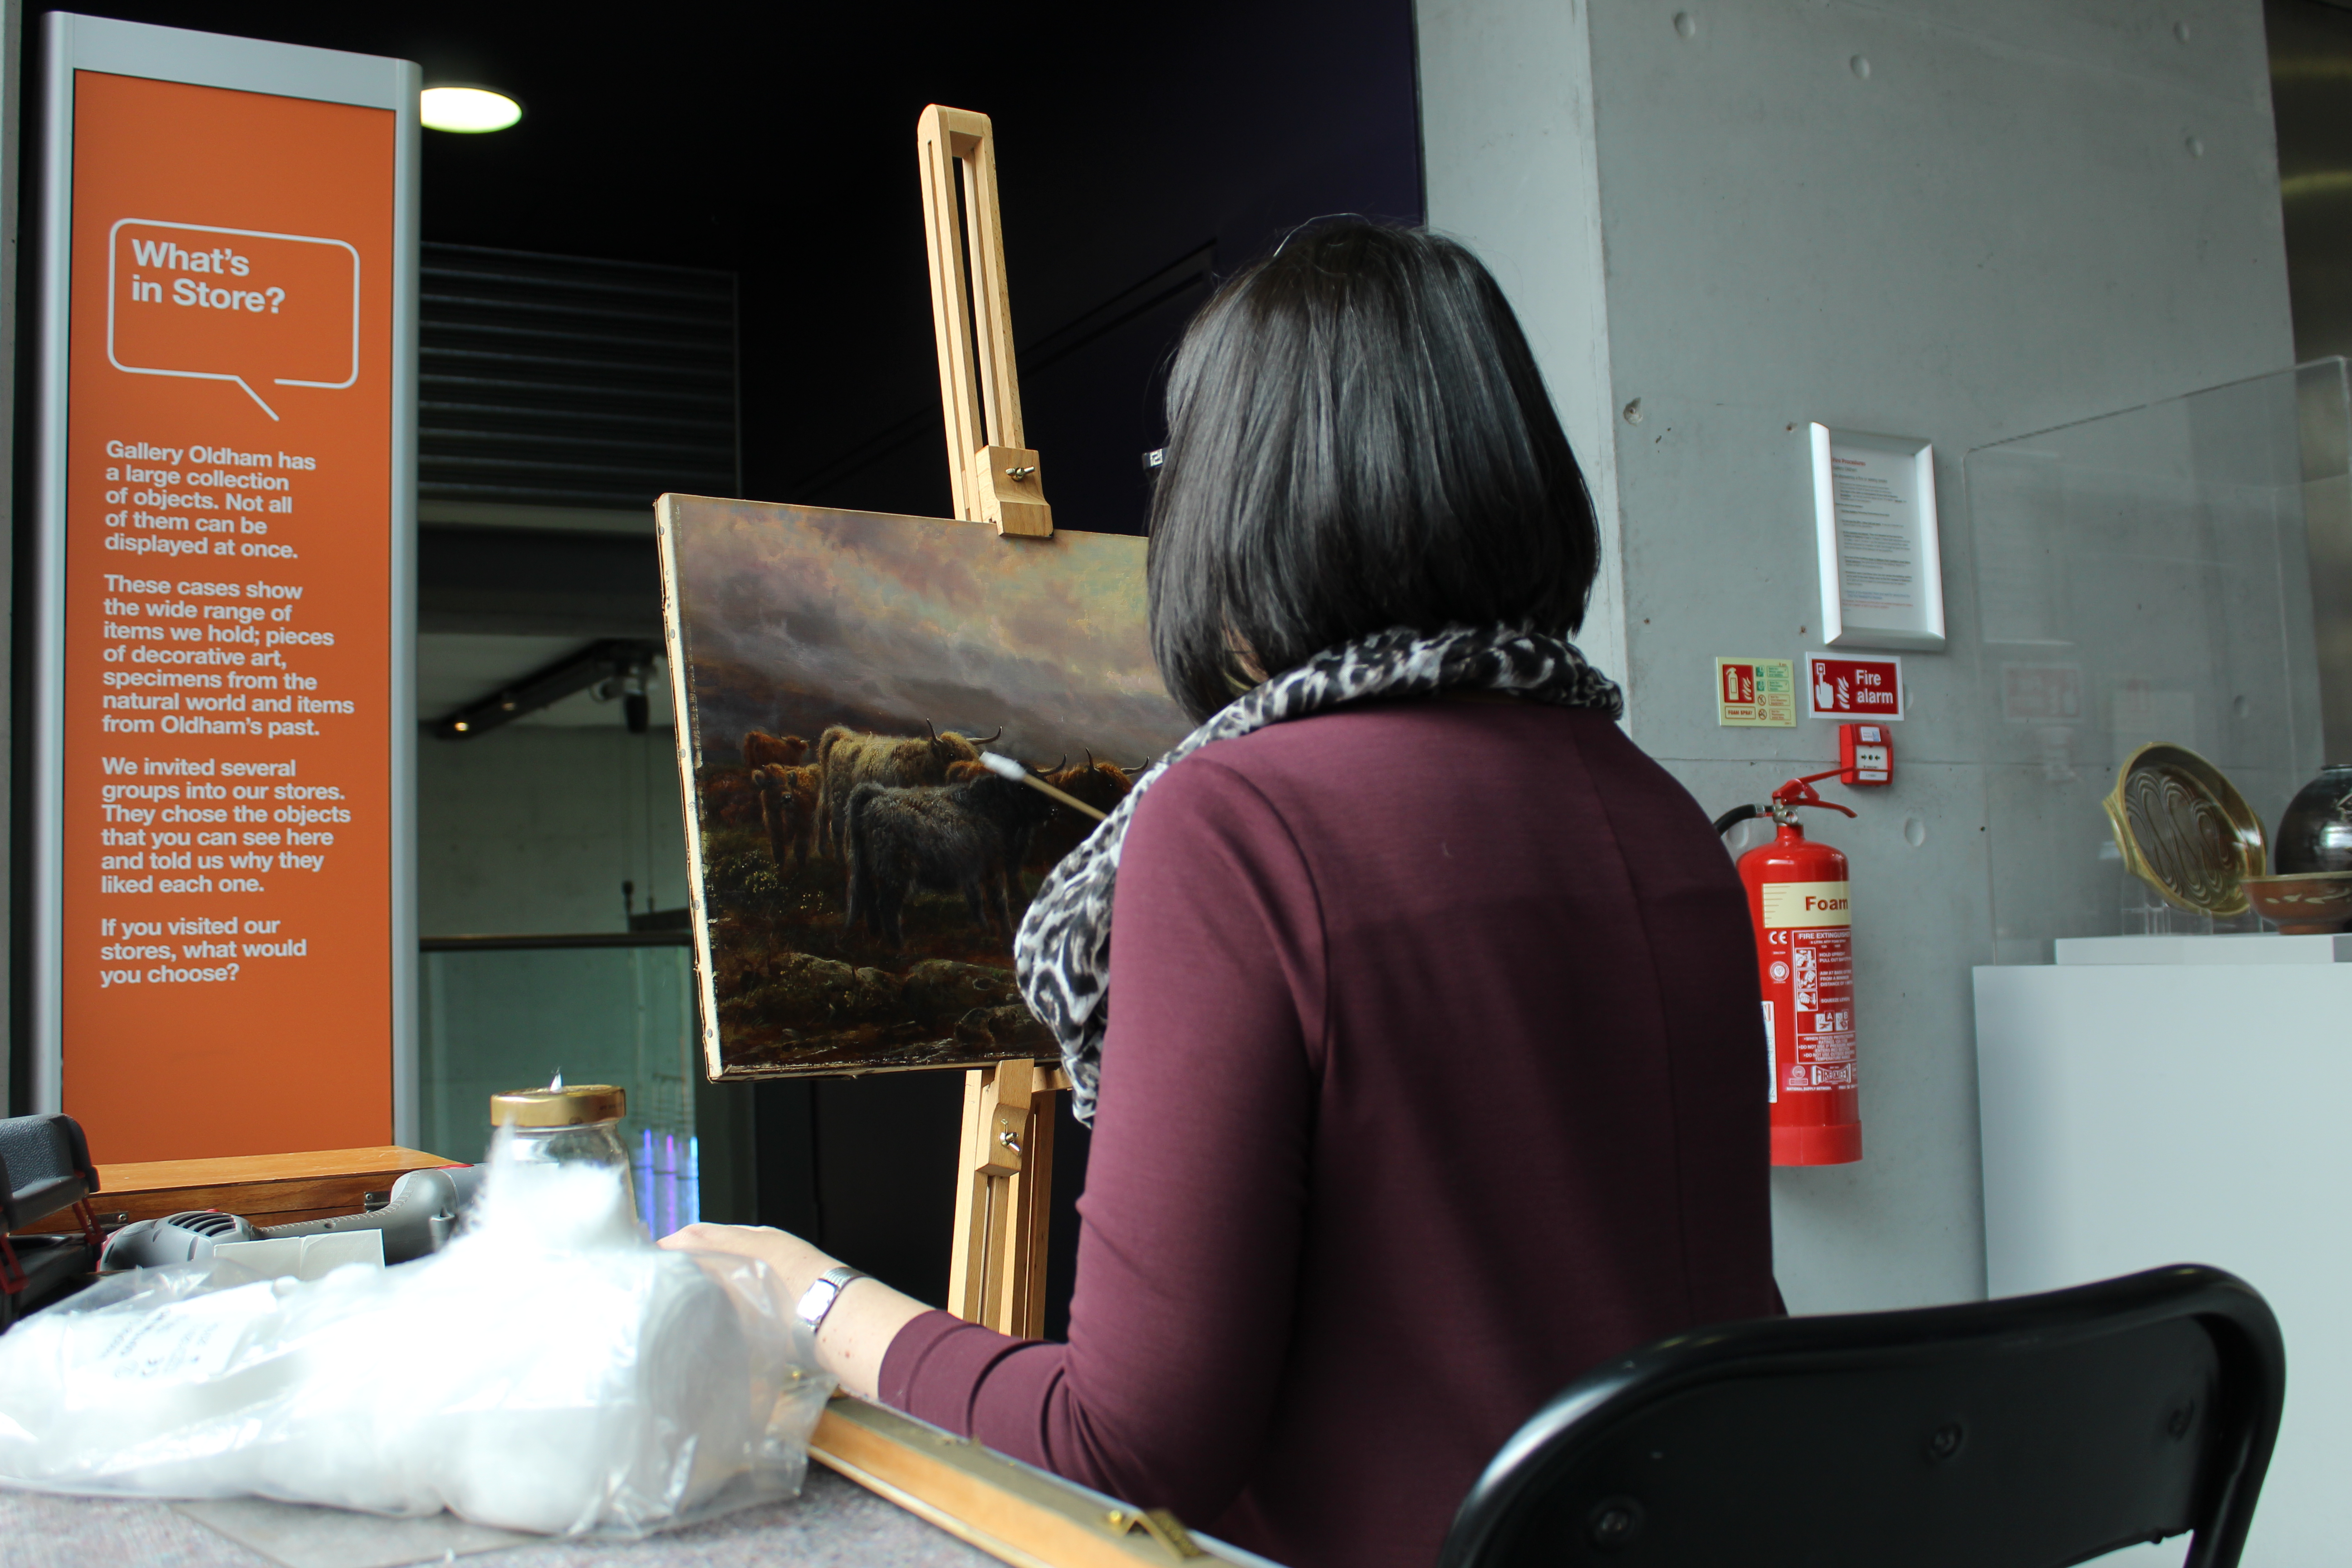
My latest project is working with Gallery Oldham to conserve paintings from their collection that were damaged in a flood. The variation in severity of damage is vast, with some paintings really badly affected by direct contact with water, while others have been damaged by the humidity. I have taken some of the larger and more badly damaged paintings into my studio to work on over the coming months. For the smaller and less badly affected ones I have been working from a pop-up studio in the gallery while it is open.
Working in my pop-up studio in Gallery Oldham
I’ve worked in my pop-up studio twice, with my next visit booked in for the beginning of November. It’s a very different way of working for me, as I’m making assessments and then doing the remedial work straightaway. So far I’ve repaired a damaged frame, surface cleaned three pictures with adjusted water, consolidated a large, lifting paint flake, re-tensioned canvases, tied in stretcher keys and lined frame rebates. I’ve come across more nailed in pictures than I’d like, but I’m replacing the nasty things with brass strips. It’s been a challenge to make sure I have all of the right kit for carrying out such diverse treatments, but the joy of going back several times is that I can always pick something up next time.
A few people have passed by while I’ve been working but not many people have come to say hello. I think in the coming visits there will be some information about what it is that I’m doing, and I’m thinking of reorienting my little space to invite more interaction with visitors, which might help people feel less like they’re interrupting. So if you’re in Oldham on a Monday come and see if I’m working. If I’m not there it’s still well worth the visit.
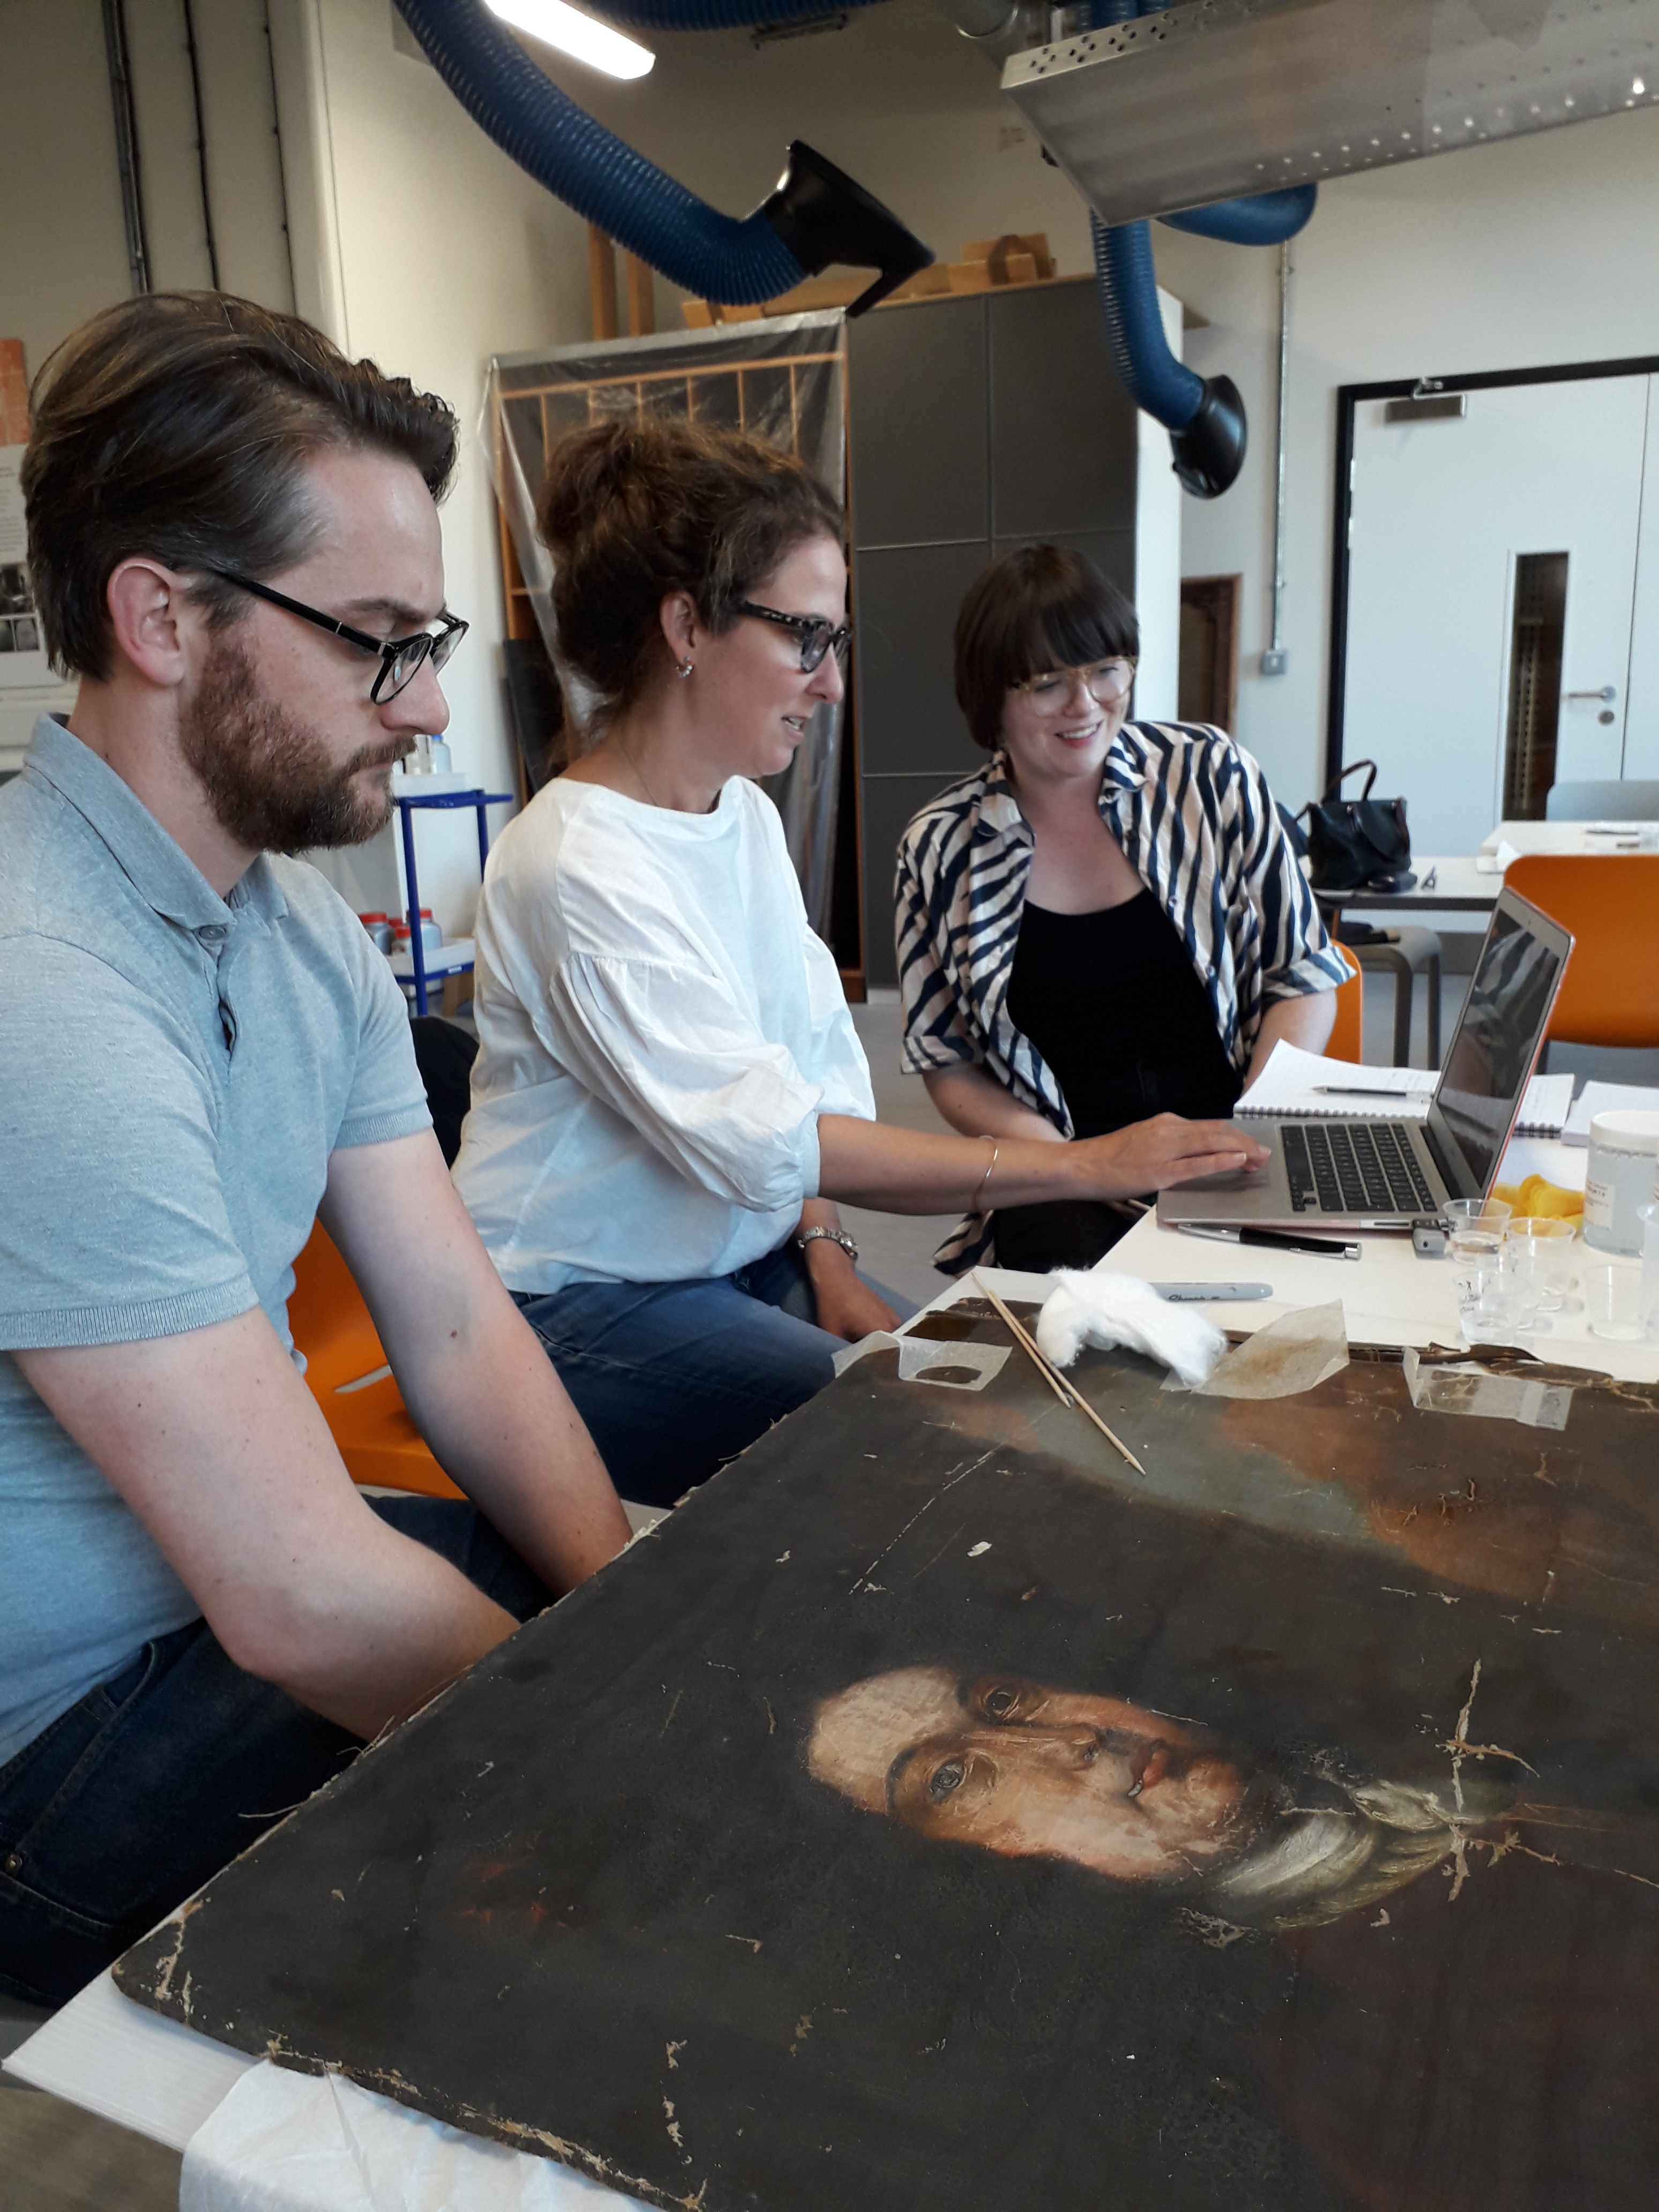
I spent a week in London learning about a new (to me) system for cleaning paintings called the Modular Cleaning Program, through lectures and lab/studio time. The leader of the course was Chris Stavroudis, an independent conservator from Hollywood who has been working on complex cleaning problems with the conservation team at The Getty for many years. Thirty conservators at different stages in their careers, mainly from the UK but also from Europe, the US and Australia, gathered to learn something new.
What is the MCP?
It’s called the Modular Cleaning Program (MCP) because from a kit of stock solutions you can mix and match to test lots of different solutions in a short time. Though the recipe for the tests may change, there are always five parts to the recipe, which helps keep things simple. The five elements are water, buffer, chelator, surfactant and gel. In any small test you use 1ml of each component and that ensures that everything is at the correct concentration. Using the accompanying computer software, which will automatically adjust all of the elements if you make a change to one, even an art historian like me can be confident that I’ve not mixed up something I shouldn’t have. That’s not to say that the computer program does the thinking, just that it keeps track of all of the different elements for you.
Here comes the science bit
The lectures were patiently delivered to a room largely full of arts people, rather than scientists, trying their best to understand. As conservators, we could see the applications of the science even if it was a struggle to get a handle on the molecular workings. The range of experience among the people in the workshop was really useful during discussion times, as people’s questions and comments helped everyone get more out of the workshop.
The concept of solubility parameters (the intermolecular forces that hold things together, determining the kind of forces needed to split them up) and that ‘like dissolves like’ is central to all cleaning. While this is something I was taught during my training, Chris Stavroudis and his colleagues have really been digging down into what goes on inside layers of dirt, varnish and paint, and even what’s going on within each of those things and formulating solutions to address each one.
It starts from looking at what we already use safely (for the painting) and effectively and tries to improve it (the computer program button for trying the improve the solution says ‘Yes but modify’). So, for example, a lot of us use spit for removing surface dirt (this did get a bit contentious during the week as some people think it’s too disgusting). What’s good about spit is that it’s slightly viscous, meaning it doesn’t go everywhere, and it’s full of enzymes that can target certain components in the dirt, and it comes free and ready buffered. The less good things are that it’s a bit icky, it’s inconsistent (depending on whether you had a heavy night on the gin or pineapple at lunch) and you need to clear it from the surface with water, which some surfaces don’t like. Then there’s water. It can be deionised, distilled, carbonated or from the tap. For a long time I assumed it was best to use deionised water, as it seems more scientific and careful somehow (as you’ve gathered I’m not a natural scientist). However, its lack of ions means it’s hungry and can strip ions from a surface indiscriminately, which means its sometimes better to use tap. In the MCP there is a selection of adjusted waters, which means they are pH buffered and conductivity controlled (conductivity is how you measure the ions in the water) so that you can use the right one for the job.
When it comes to varnish removal, I and many or even most conservators use free solvents, that is, liquids in a bottle applied to the surface with a swab and evaporate willy -nilly into the air and into your lungs. While this is perfectly fine for the paintings (so long as you’ve tested for safety beforehand) it’s not the healthiest of occupations. The MCP allows for formulating aqueous gels, emulsions and micro-emulsions that carry smaller amounts of solvent or resin soaps instead and stop the solvent from evaporating so readily. An aim of the MCP is to find something that is better for the conservator and better for the environment. There is an added element of controllability, as each distinct layer of grime and oxidation is targeted by a specific solution and removed to leave a displayable surface. This way the client and conservator can choose together where to stop for the best result. Of course, not all paintings play by the rules and this kind of layer unpacking won’t always be possible.
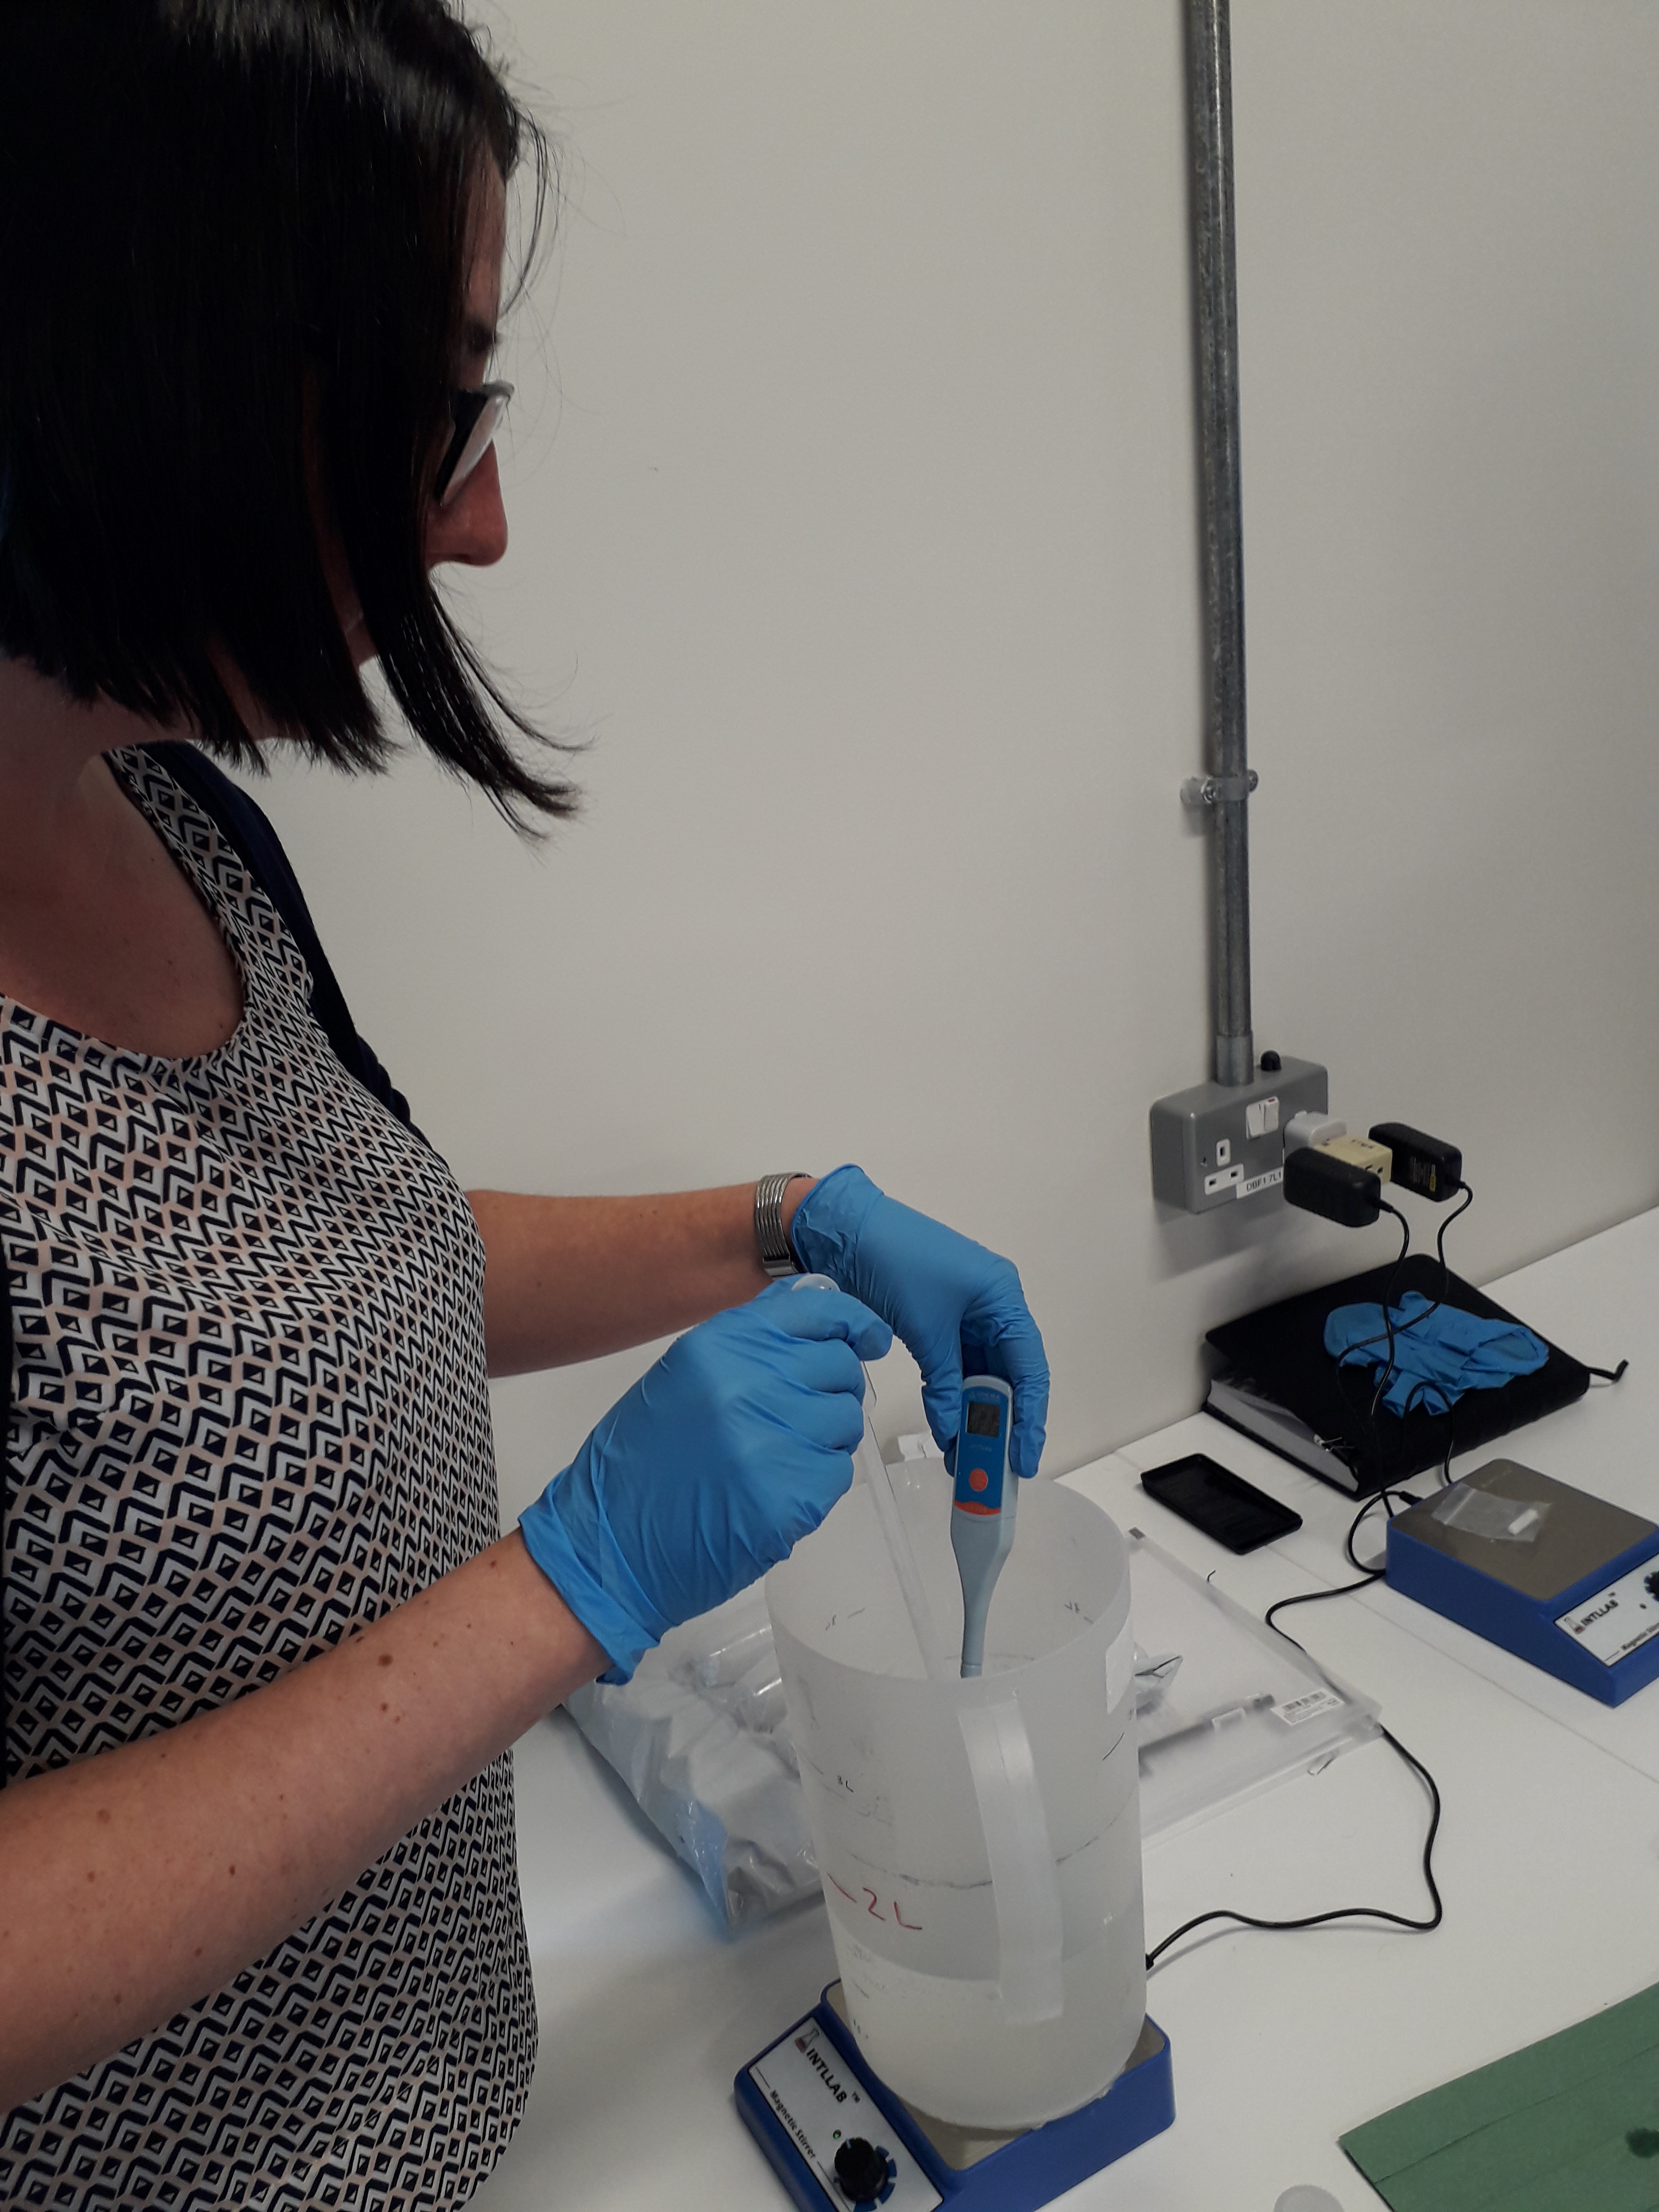
Getting stuck in
Measuring the pH of a solution
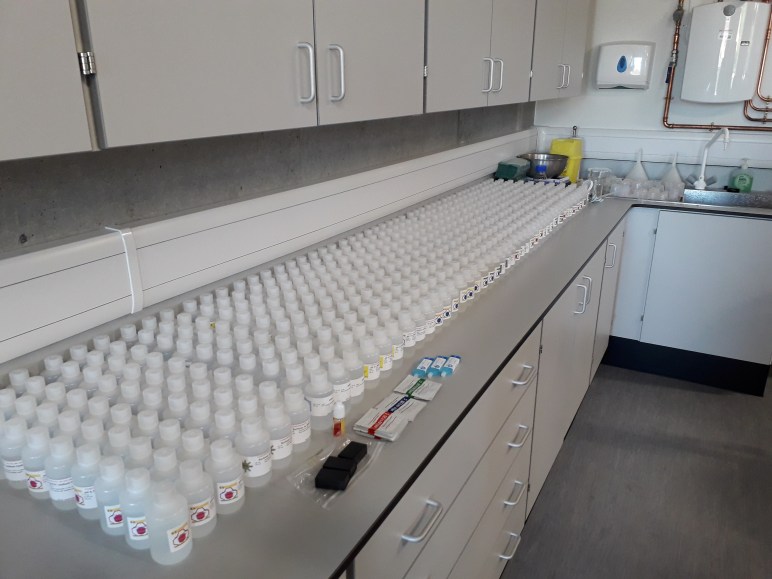
Making the solutions
Lab time had a bit of a Breaking Bad feel to it. We split into groups and given a recipe to follow, though we first had to multiply everything by 30 to ensure there would be enough for everyone to take home. I’ve never seen so many bottles of chemicals. Many of the solutions required making up to a specific pH, which in practice meant a lot of grown-ups staring intently at pH meters and getting very excited by seeing the numbers change. The excitement came as carefully prepared solutions suddenly went shooting out of a buffer zone (something, according to the lectures, to do with de-protonation and fat kids on see-saws) and had to be salvaged by rebalancing the components. By day 3 or 4 we developed a pretty good production line and knew when to go carefully and when we could be more relaxed.
Bottling up one of our solutions.
Testing the program
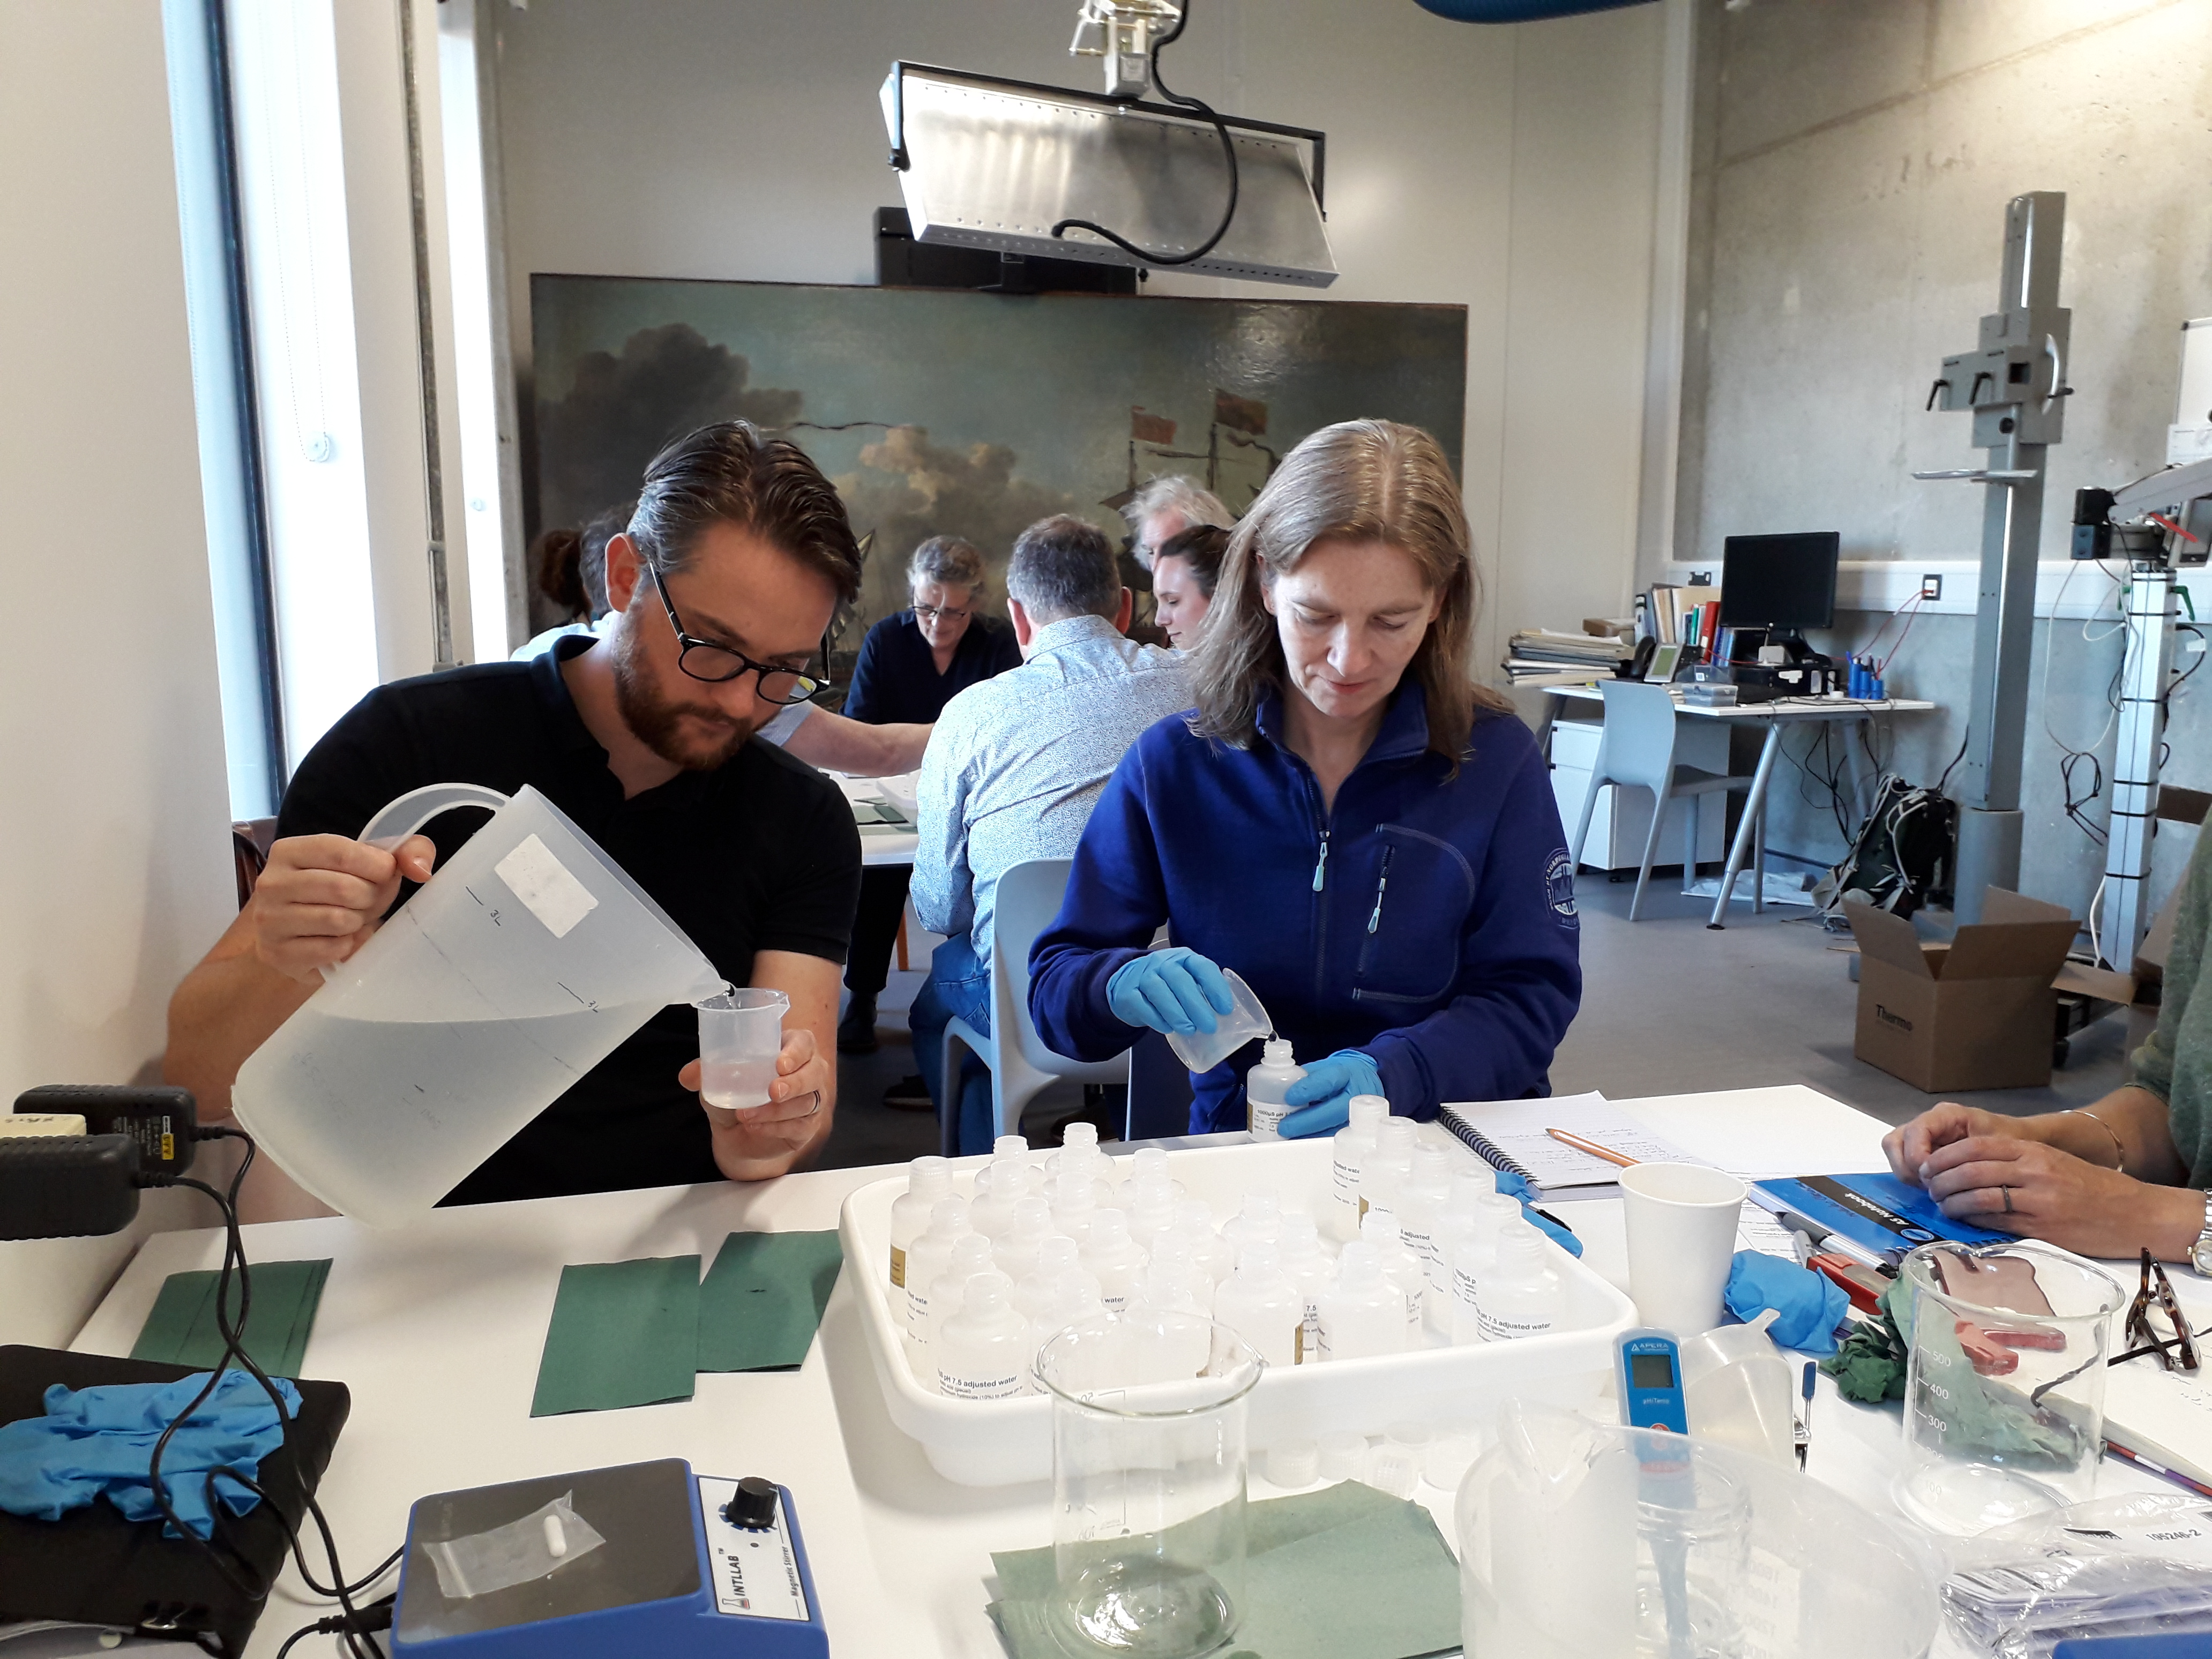
When we weren’t cooking up litres of stock solutions we worked in groups on some sample paintings. These paintings are the kind of thing that many institution studios have in drawers, that someone has had a go at in the past and given up on. The one my team were working on had been partially cleaned, meaning that there was still some varnish on in some places, but other areas had been over cleaned, damaging the paint underneath. There isn’t anything quite like trying something out on authentic dirt and varnish layers, especially when there’s no pressure to get it right! My friend Mike, who trained at the same time as me in Northumbria and now works at the Whitworth Gallery, took a video of me cleaning our group’s painting with one of our concoctions.
My team mates using the MCP software to find a way to clean this painting.
Another group had a painting that was really difficult to clean. Some of the mixtures had no effect and others were cleaning it but also taking off the top layer of paint too. By trying different solutions and methods of application there was a glimmer of hope for that painting by the end of the week, but the clock had run down.
Bringing it back
Now that I am back with my large and heavy box full of solutions and my head full of new ideas, I’m excited to see when my first opportunity will be to use it. I’m excited about adjusted water. Now, rather than choosing between just deionised water or tap water I am able to test pH buffered and conductivity controlled waters that will evaporate more completely from the surface.
My mind has been brought back to the importance of working out the constituents of the stuff that I’m trying to remove, and using that information to tackle and target it. It’s so good to have more tricks up my sleeve when dealing with more complex cleans, especially when that means using less harmful substances. I don’t suppose I’ll abandon spit, but there are other things that I’ll probably phase out.
I’ve also been reminded of what a funny, clever bunch of people work in paintings conservation around the country. The enthusiasm, enjoyment of the job and keenness to accrue new skills is just as sharp in those who have been in the business for 30+ years as it is for those who have just graduated.
The Autumn will forever feel like the start of a new year for me. I think a lot of people feel the same way, but I’m certainly feeling very much like sharpening my pencils, putting on some new shoes and buckling down at the moment. I’ve even written myself a timetable for the next few weeks to ensure I get everything done before the start of a big project later in the month, which will involve some studio work and some on-site work. It’ll be nice to be on-site for a change, as working in my studio is a rather solitary pursuit. I’m going to be carrying out some minor remedial conservation work on a number paintings affected by a flood. I’ll share more about this once the project is underway.
I’m also going on a week-long course soon, learning how to more effectively and safely clean modern paintings. It’s really important for me to keep up to date with recent developments in conservation to ensure that I am doing the best for the paintings that come through my studio. The prospect of spending a whole week with a group of other conservators is both exciting and a bit daunting, since I’ve not done anything quite like it since I finished training. I’ve got loads of reading to do in preparation. I think it might tell you something about the kind of student I was that I’m writing a blog post rather than actually doing the reading… I’d better get to it!
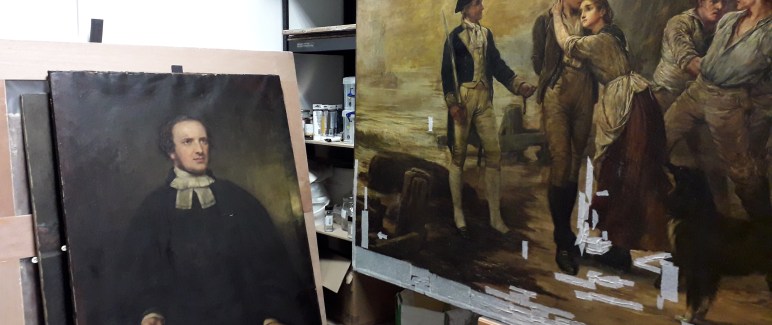
One of those botched restorations, the Spanish St George sculpture, was reported as having been ‘unrestored’ recently, meaning that the overpaint that had been so liberally daubed over the original had been removed and the whole thing had been more sympathetically and expertly treated. It’s a bit of a clumsy term, but I know what they are trying to say. It reminded me of a couple of paintings I’ve had through my studio, which had been ‘restored’ to within an inch of their lives. Whoever had had them last had almost completely repainted parts of them, which I suppose is where people get the idea that that’s what I do (I don’t). It can be a bit tricky when something has had too much done, because I can’t be certain of what will be left underneath. Often they are heavily damaged, but there is almost always more original material under the over-zealous restorer’s work than the extensive treatment would suggest.
Over-restored portrait
Overpaint removed: plenty of original paint uncovered
After treatment: reintegrating the damage to allow the original paint to show.
This portrait on panel had a long split running through the centre. The edges of the split were uneven, so the previous restorer had filled over original material to smooth the surface. However, once they’d done that they’d covered the original nose up with filler and had to make one up. The one they painted was facing the wrong way, with both nostrils visible where there should only be one. When I removed the overpaint and excess fill, I found that the original nose was almost completely intact, there was little evidence to support such a strong shadow on the forehead or the eyelid. Although the surface, with the big step between the one side of the crack and the other, is still visually problematic, my minimal filling and retouching mean that much more of the original artist’s work can be seen and, I hope, enjoyed.
Before treatment (after over-restoration)
Evidence of past scrubbing
After toning out the losses
Another unrestoring job, from very early in my career, was this portrait of a male sitter. This chap had been smoothed out all over: given a new hair do, a bigger chin and a new sleeve that didn’t quite make sense. My client wanted to see what was really there, so I undertook to remove all of the previous restorations. I found that the painting had been severely over-cleaned before it was overpainted (not necessarily by the same person). It is quite daunting to take something that looks whole (for all that it is obviously not original) and make it look ‘worse’. However, the surviving paint was so much more delicate and translucent than the restorer’s opaque work that removing it gave the painting back its quality. The retouching was quite difficult, with such extensive areas of loss to tackle with my tiny brush, but by ‘knocking back’ the bare wood with colour, I was able to bridge the gaps and discover what remained. Importantly, I didn’t try to invent what I thought should have been there or attempt to make it look ‘as good as new’.
Having pointed out what a excessive, incoherent and unsympathetic work these other restorers have done, I should say that the restorations were easily reversible without damage to the original. This is where my two ‘unrestorations’ depart from the headline grabbers, which have been further damaged as well as disfigured by inexpert hands. I’ve said it before and I’ll say it again, please don’t try this at home!
I posted a while back in reaction to the whole “how have you got the patience to use such tiny brushes?” thing, saying that I also do some fairly heavy-duty stuff too. These blog posts are always quite heavily influenced by what I’m working on in the moment, and perhaps I didn’t explore the rationale and the usefulness of using such tiny brushes for retouching. It was only after having to give a talk about a recently finished project that made me really think about how to explain the process of retouching and how I approach it. I know that people do things differently through the field, so this is very much a personal account, rather than a more general explanation of the professional practice.
Retouching is hugely important and often controversial. The human eye is extremely sensitive to damage, to the thing that is not “right”. A painting can be 99.9% intact but the viewer will usually find the 0.1% that is damaged. When the viewer spots this imperfection they will, likely as not, be wondering what happened, and the illusion of the painting (its purpose) is lost; forgotten. (To be honest, this has made my ability to enjoy looking at a painting as a punter more difficult, but I’m starting to get it back.) By removing or reducing a distracting blemish, the painting can function as it was intended. However, when people see a painting in its unretouched state, they can sometimes come to think that the work of the conservator is dishonest; making the painting appear whole when it is not. Think of the Salvator Mundi, bought for $450m yet having its authenticity questioned in part because of photographs of its unretouched condition.
As an art historian, rather than a painter, I have learnt to paint through retouching, rather than bringing painterly knowledge and experience to my retouching. My earliest attempts at retouching were thwarted by completely practical things, like not knowing the consistency of the medium and the ratio of pigment to binder, resulting in being unable to get any colour at all to come off the brush and onto the fill; nevermind getting the right colour or achieving the correct level of gloss. Once I did get the paint to transfer there are all of these other factors to take into account, such as transparency and covering power, metamerism, and the dreaded (and useful) turbid medium effect.
There have been different ideas about ‘best practice’ in retouching over the years. People have debated whether or not the retouching should completely disappear or whether it should subtly differ from the original, to make it clear what is the work of the restorer. Conservators talk about “six feet/six inches”: the retouching should not be visible from a viewing distance of six feet but can (maybe even should?) be visible from a viewing distance of six inches.
So there are quite a number of practical variables in play already before I even get to what it is I’m supposed to be filling in this gap with. Sometimes it’s a fairly small loss that needs one colour painting in just to knock it back. Other times there are a lot of lines or colours that will help to reintegrate a loss. On still further occasions, perhaps for more extensive loss or loss in a significant area, such as a face, all I can do is feel my way. Using my tiny brush, I try to match a colour in the surviving paint and dot-in from the edge. As I take out the distracting white fill, it becomes more obvious to me what is going on and what should be there. As I match the colours I can find existing areas on the other side of the gap, and see whether they need to be joined up. It can be daunting to attempt to reintegrate some missing lips, for example (below a detail from a heavily damaged Madonna and Child), but not to attempt it would be deeply unsatisfactory.
After cleaning and before retouching
After retouching
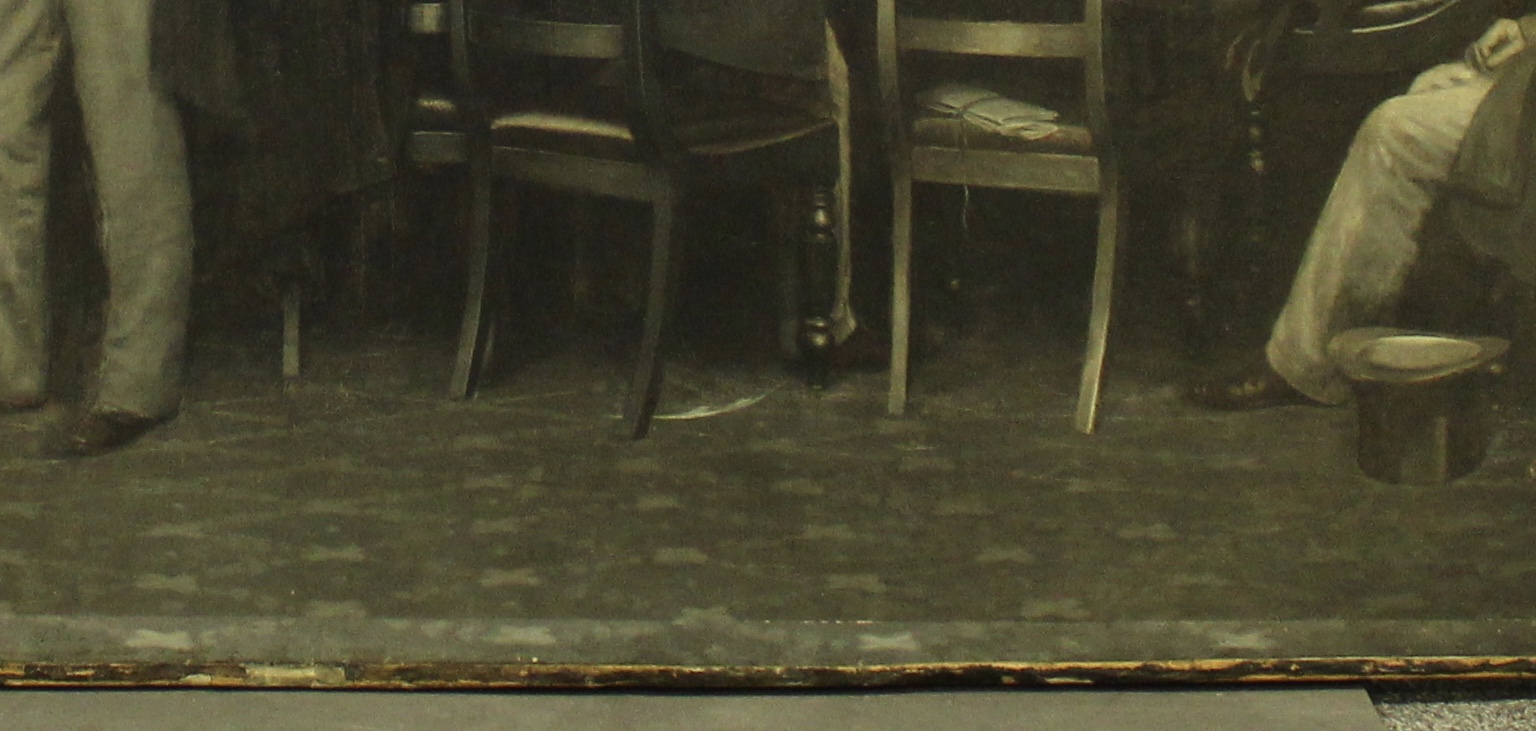
Something else that I always have to do when I’m retouching is to step back. I have to read the composition to make sure, especially when retouching abrasions and scratches, that they are damage and not, in fact, intentional. A dropped quill in one of my most recent paintings could have easily been mistaken for a scratch and painted out.
Detail of The Central Executive Cotton Famine Relief Committee by Arthur Hughes et al showing a dropped quill, which could have been mistaken for a scratch.
What helps soothe my nerves, when I am carrying out more significant retouching, is that my work is reversible. I do what I think is right, both by the painting and by professional standards, but I also do what can be undone. Should someone down the line find that I have got it wrong, they can remove my retouching without damage to the original, and embark on new treatment as they see fit.
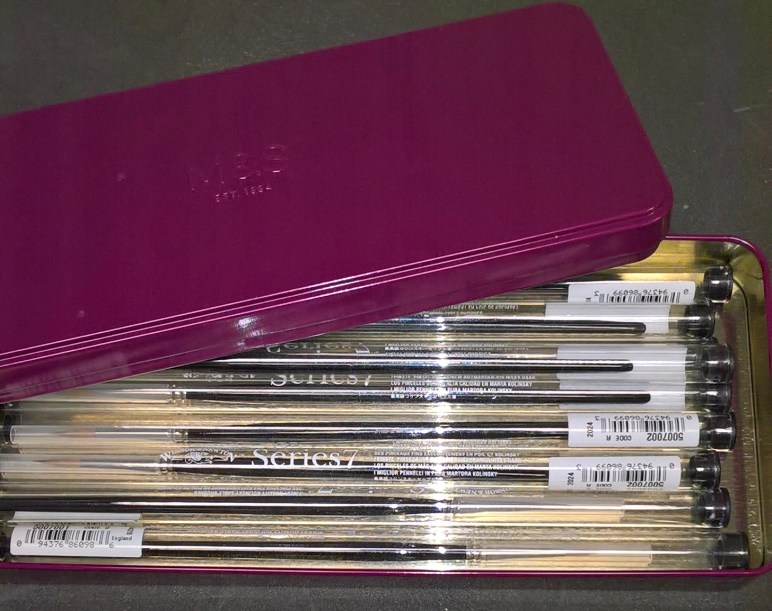
So I use my tiny brushes so that I can stay within the lines of the fill and so that I can incrementally discover what may have been there before. And, yes, it does take patience and I do need a steady hand.
As I was first finding out about conservation one of the things that struck me was all the cooking up of concoctions that has to be done. And what concoctions- rabbit skin glue, animal glue, fish glue, beaver glue (this one was actually a mishearing of BEVA). And if it’s not based on an ancient traditional recipe involving part of an animal then it’s futuristic and scientific- Paraloid B72, MS2A, Laropal A81, BEVA 371, Plextol, Regalrez.
Most if not all conservators have a collection of rather unappetising recipes that they will be called upon to cook on a more or less frequent basis depending on what they’re working on. Some of these collections are organised in a special recipe books, very much the preserve of an individual. Others are scraps of stained and aged paper in different peoples’ handwriting that act as a tangible history of conservation as well as history of the studio. Others still are taped inside the solvent cupboard so that anyone making the stock solution for whatever the favoured varnish is can just add more to the massive jar.
In a fairly young profession like conservation materials come in and out of favour, depending on new research or practical experience. Some of the materials once considered standard are either now out of commission for ethical reasons, perhaps concerns over reversibility or ‘re-treatability’. Wax-resin is a good example of this. It was used widely in the mid- to late twentieth century as a good solution to the problem of moisture response and susceptibility to mould of the earlier lining-material-of-choice glue-paste (glue-paste is still used at the National Gallery now). The problem is that once the wax has impregnated the canvas it’s not coming out again and the whole painting is now susceptible to deformations associated with heat among other things. Other times there are supply-chain issues. Such as a reported scarcity of isinglass (glue made from the dried swim-bladders of Russian sturgeon fish) brought on by the Cold War*; or MS2A, (a resin used for varnishes that is the by-product of some industrial process that I don’t know about) which first became cripplingly expensive when it had to be made as a product in itself due to changes in whatever process it was the by-product of by one man who has now retired, taking it from expensive to unavailable without a great deal of warning.
Increasingly the materials and supplies needed are becoming harder to find. In a niche profession there aren’t multiple suppliers of the things we need, which means that we are reliant on small companies and individuals. Changes in the ethics of treating pictures, with a move towards ‘minimal intervention’, means that the suppliers of previously highly demanded materials are no longer seeing that demand and are cutting conservation lines as they aren’t cost effective to produce or stock. But it’s not all doom and gloom. For all of the problems with supply that I have had in the past year I have been helped by the wider community of conservators.
Another increasingly prevalent issue with materials is sustainability. Not only are some of the materials conservators use bad for the user but they are bad for the environment. In a world becoming more conscious of bio-diversity as well as Health and Safety people are looking for alternatives to some of the solvents and materials we are using (I’m looking at you again, isinglass).
It can be daunting trying to get to grips with something unfamiliar, especially when you work on your own like I do, but it’s so important to keep up-to-date, reach out to others and to try some new recipes.
Here is a link to see how they make up very beautiful and orderly isinglass flakes at the conservation department at John Rylands Library. Next time I need to make a batch I’m going to do it their way.
*I can’t find a reference for this at the moment but I don’t think I’ve made it up. I’ll look in some actual books instead of just Googling.