Unrestoring?

One of those botched restorations, the Spanish St George sculpture, was reported as having been ‘unrestored’ recently, meaning that the overpaint that had been so liberally daubed over the original had been removed and the whole thing had been more sympathetically and expertly treated. It’s a bit of a clumsy term, but I know what they are trying to say. It reminded me of a couple of paintings I’ve had through my studio, which had been ‘restored’ to within an inch of their lives. Whoever had had them last had almost completely repainted parts of them, which I suppose is where people get the idea that that’s what I do (I don’t). It can be a bit tricky when something has had too much done, because I can’t be certain of what will be left underneath. Often they are heavily damaged, but there is almost always more original material under the over-zealous restorer’s work than the extensive treatment would suggest.

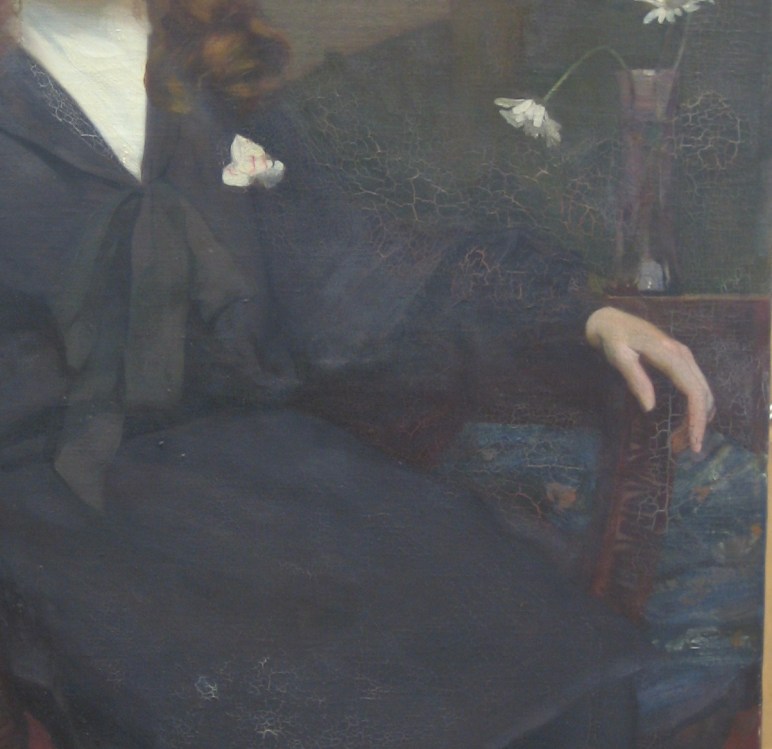
This portrait on panel had a long split running through the centre. The edges of the split were uneven, so the previous restorer had filled over original material to smooth the surface. However, once they’d done that they’d covered the original nose up with filler and had to make one up. The one they painted was facing the wrong way, with both nostrils visible where there should only be one. When I removed the overpaint and excess fill, I found that the original nose was almost completely intact, there was little evidence to support such a strong shadow on the forehead or the eyelid. Although the surface, with the big step between the one side of the crack and the other, is still visually problematic, my minimal filling and retouching mean that much more of the original artist’s work can be seen and, I hope, enjoyed.

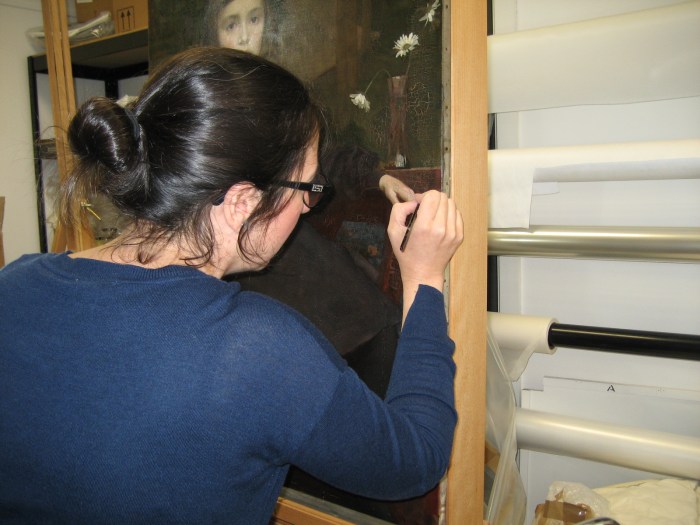
Another unrestoring job, from very early in my career, was this portrait of a male sitter. This chap had been smoothed out all over: given a new hair do, a bigger chin and a new sleeve that didn’t quite make sense. My client wanted to see what was really there, so I undertook to remove all of the previous restorations. I found that the painting had been severely over-cleaned before it was overpainted (not necessarily by the same person). It is quite daunting to take something that looks whole (for all that it is obviously not original) and make it look ‘worse’. However, the surviving paint was so much more delicate and translucent than the restorer’s opaque work that removing it gave the painting back its quality. The retouching was quite difficult, with such extensive areas of loss to tackle with my tiny brush, but by ‘knocking back’ the bare wood with colour, I was able to bridge the gaps and discover what remained. Importantly, I didn’t try to invent what I thought should have been there or attempt to make it look ‘as good as new’.

Having pointed out what a excessive, incoherent and unsympathetic work these other restorers have done, I should say that the restorations were easily reversible without damage to the original. This is where my two ‘unrestorations’ depart from the headline grabbers, which have been further damaged as well as disfigured by inexpert hands. I’ve said it before and I’ll say it again, please don’t try this at home!

Tiny brushes

Box of brushes

I posted a while back in reaction to the whole “how have you got the patience to use such tiny brushes?” thing, saying that I also do some fairly heavy-duty stuff too. These blog posts are always quite heavily influenced by what I’m working on in the moment, and perhaps I didn’t explore the rationale and the usefulness of using such tiny brushes for retouching. It was only after having to give a talk about a recently finished project that made me really think about how to explain the process of retouching and how I approach it. I know that people do things differently through the field, so this is very much a personal account, rather than a more general explanation of the professional practice.

Retouching is hugely important and often controversial. The human eye is extremely sensitive to damage, to the thing that is not “right”. A painting can be 99.9% intact but the viewer will usually find the 0.1% that is damaged. When the viewer spots this imperfection they will, likely as not, be wondering what happened, and the illusion of the painting (its purpose) is lost; forgotten. (To be honest, this has made my ability to enjoy looking at a painting as a punter more difficult, but I’m starting to get it back.) By removing or reducing a distracting blemish, the painting can function as it  was intended. However, when people see a painting in its unretouched state, they can sometimes come to think that the work of the conservator is dishonest; making the painting appear whole when it is not. Think of the Salvator Mundi, bought for $450m yet having its authenticity questioned in part because of photographs of its unretouched condition.

As an art historian, rather than a painter, I have learnt to paint through retouching, rather than bringing painterly knowledge and experience to my retouching. My earliest attempts at retouching were thwarted by completely practical things, like not knowing the consistency of the medium and the ratio of pigment to binder, resulting in being unable to get any colour at all to come off the brush and onto the fill; nevermind getting the right colour or achieving the correct level of gloss. Once I did get the paint to transfer there are all of these other factors to take into account, such as transparency and covering power, metamerism, and the dreaded (and useful) turbid medium effect.

There have been different ideas about ‘best practice’ in retouching over the years. People have debated whether or not the retouching should completely disappear or whether it should subtly differ from the original, to make it clear what is the work of the restorer. Conservators talk about “six feet/six inches”: the retouching should not be visible from a viewing distance of six feet but can (maybe even should?) be visible from a viewing distance of six inches.

So there are quite a number of practical variables in play already before I even get to what it is I’m supposed to be filling in this gap with. Sometimes it’s a fairly small loss that needs one colour painting in just to knock it back. Other times there are a lot of lines or colours that will help to reintegrate a loss. On still further occasions, perhaps for more extensive loss or loss in a significant area, such as a face, all I can do is feel my way. Using my tiny brush, I try to match a colour in the surviving paint and dot-in from the edge. As I take out the distracting white fill, it becomes more obvious to me what is going on and what should be there. As I match the colours I can find existing areas on the other side of the gap, and see whether they need to be joined up. It can be daunting to attempt to reintegrate some missing lips, for example (below a detail from a heavily damaged Madonna and Child), but not to attempt it would be deeply unsatisfactory.

Something else that I always have to do when I’m retouching is to step back. I have to read the composition to make sure, especially when retouching abrasions and scratches, that they are damage and not, in fact, intentional. A dropped quill in one of my most recent paintings could have easily been mistaken for a scratch and painted out.

fullsizeoutput_4c7e
Detail of The Central Executive Cotton Famine Relief Committee by Arthur Hughes et al showing a dropped quill, which could have been mistaken for a scratch.

What helps soothe my nerves, when I am carrying out more significant retouching, is that my work is reversible. I do what I think is right, both by the painting and by professional standards, but I also do what can be undone. Should someone down the line find that I have got it wrong, they can remove my retouching without damage to the original, and embark on new treatment as they see fit.

So I use my tiny brushes so that I can stay within the lines of the fill and so that I can incrementally discover what may have been there before. And, yes, it does take patience and I do need a steady hand.

Not just tiny brushes!

Sometimes, when I tell people what I do, they say something along the lines of “I wouldn’t have the patience to work with those tiny brushes!”. Usually I just laugh- conservation is a very detail oriented occupation- but after the most recent time it happened it got me thinking. What do people imagine I do with such tiny brushes? Do they equate small brushes with some kind of exercise in fussiness when really a larger brush would be more appropriate? I was reminded of an off-hand remark in a newspaper article about cleaning Michelangelo’s David in 2004, where the original conservator resigned after her recommendation to dry dust it was rejected. The columnist reported her resignation comments and then wrote “and took her tiny brushes elsewhere”, which made her sound like an old fuss-pot. As a rule I would say that conservators like to keep things small to increase control. In paintings conservation we use tiny brushes to dot out tiny losses or certain kinds of cracks without going over onto the original paint.

But it’s not all tiny brushes. I’ve also got a growing collection of heavier duty tools for working with wooden supports and frames.


WP_20180627_11_55_37_Pro
Woodworking isn’t always what people imagine as part of my job

This week I have been making a build-up for the frame of a picture I’ve been working on.  A build-up is sometimes added to the frame if the painting is sticking out at the back. I’m also adding glazing to the frame as it is an unvarnished painting with high impasto that is prone to collecting dust. The glazing plus the slip frame for spacing will mean that the original rebate just won’t be deep enough to hold the painting satisfactorily. It’s been too hot for it but I’ve been cutting lengths of wood down to size using a mitre guide and my trusty tenon saw. I can’t wait to get back to my tiny brushes.


Drying cracks

IMG_3535
Beth retouching drying cracks with a small sable brush

I’m currently working on a lovely portrait from the early 20th century that has extensive drying cracks. Although drying cracks can be quite alarming to look at they are usually completely stable. They occur when the upper paint layer dries more quickly than the one below, which means that as the wet layer underneath shifts as it dries the upper layer is pulled apart. Sometimes drying cracks aren’t particularly problematic but in this case a lot of white is showing in a black field of colour. When a paint layer is damaged your eye is drawn to the damage rather than seeing the subject, so I’ve been retouching the widest of the drying cracks to give some solidity to the forms. The medium I’m using for retouching has completely different solubility parameters to the original paint, which will make it reversible in the future if necessary.

IMG_3529
My retouching palette for this painting