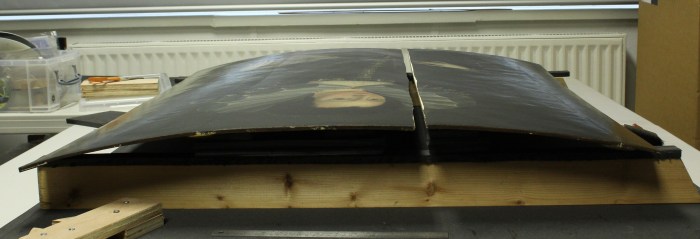
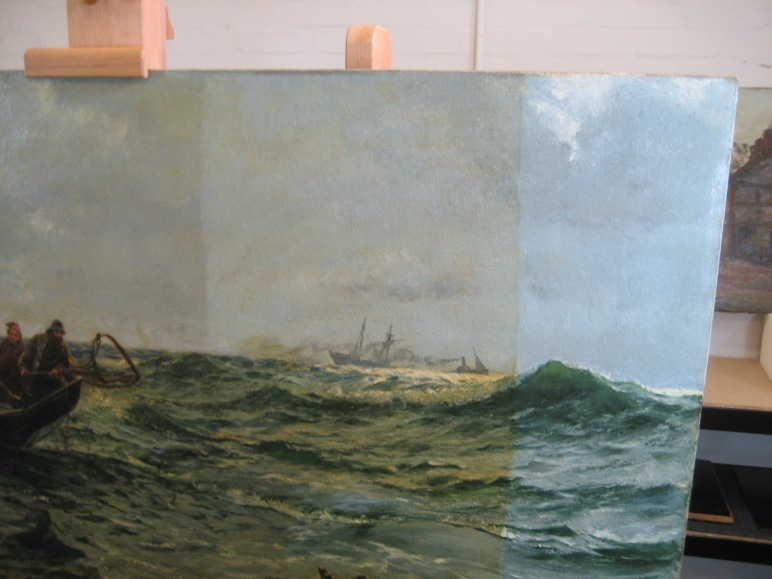
2019 is off to a busy start so I’ve had to hit the ground running. My first job of the year was to prepare a painting for loan by doing a small repair- reattaching a small piece of paint that had come off but was still in the frame. Unfortunately the small loss was just the first indication of a more serious problem and by the time the painting got to the studio the small repair had turned into a big one– one of the panels had become detached from the rest! It’s back in one piece now and so I’ll get on with sorting out the paint loss and its documentation before it goes off on its loan at the end of January.
Setting up the two pieces of panel for re-joining
Next month holds another challenge- the biggest painting I’ve ever worked on in my studio. It’s a 3.5m long behemoth of a group portrait, again getting ready for a loan. Hopefully there won’t be any surprises with this one, but if there are I’ll be ready!
Colours are hugely important in painting, both in terms of aesthetics and for understanding. Colours have been imbued with meaning through the ages, which means that changes in the chemistry can lead to misunderstanding in the interpretation. Sometimes the colour change can be seen at edges that have been exposed to different conditions behind the frame’s rebate. At other times there are clues in the title of the picture that point to discolouration, but other times all of colour has changed and it requires scientific analysis to establish that it has occurred at all.
One of my favourite examples of colour change in a painting making a difference to the interpretation is The National Gallery’s painting by Robert Campin of The Virgin and Child Before a Firescreen, as described in The National Gallery Technical Bulletin Volume 15 from 1994. The Virgin Mary is shown seated reading her prayer book in a white dress. The white dress has connotations of purity, which seems appropriate for the Virgin. Except it wasn’t originally white, it was mauve, which was discovered through microscopic analysis of a paint sample. The pigments used included fugitive red lake and what we end up seeing today is the lead white that was used to make the colour lighter. Purple tones don’t usually signify purity but royalty. It puts a different spin on things.
There are also fugitive yellow pigments, as can be seen at the National Gallery of Scotland in Greuze’s painting A Girl with a Dead Canary, that fade to leave in this case blue leaves and a white canary. Yet further complications can arise when changes in the chemistry of your pigment make its Refractive Index (to do with how it interacts with light) match that of the medium (oil binder) and your paint becomes transparent. This is most often seen in thinly painted white pigments. One example is the semi-transparent newspaper in front of the fire in Sadler’sThe End of the Skein at the Lady Lever Gallery. Someone has just published research exploring colour changes in the work of a particular Flemish painter who encountered both of these unlucky colour changes entitled “Blue Cabbages and Invisible Onions”.
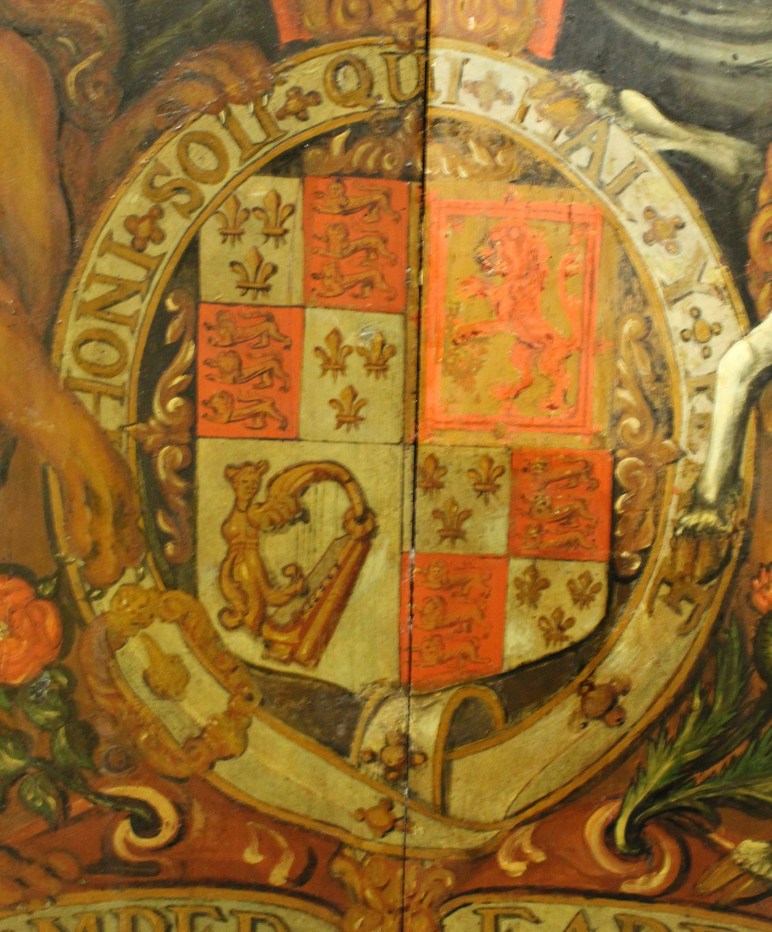
Partially cleaned coat of arms showing discolouration of smalt pigment
I’m working on an early 18th century coat of arms from a church, which shows the Royal Arms of Queen Anne. I must have been looking at it for quite some time before I realised that large parts of the scheme that look white should in fact be blue. In all likelihood this is an example of colour change in an oil painting. A blue pigment called smalt, made of cobalt containing glass, is known to fade to a pinkish grey or brown, and was used widely at this period. While many people associate light exposure with fading, often correctly, it seems that smalt discolours because of humidity in the environment.
The correct colours for the coat of arms
The meaning of the coat of arms isn’t changed as it is still recognisable as the scheme used by Queen Anne, but the visual effect is left wanting. What I find interesting is that the old repairs have tried to match the discolouration, including the yellow varnish, so the change must have occurred quite early in its history. Likewise I won’t retouch the discoloured areas to reflect the original intentions of the artist as this would hide the original material.
So look out for blue leaves and transparent newspapers and remember that you can’t always believe your eyes!
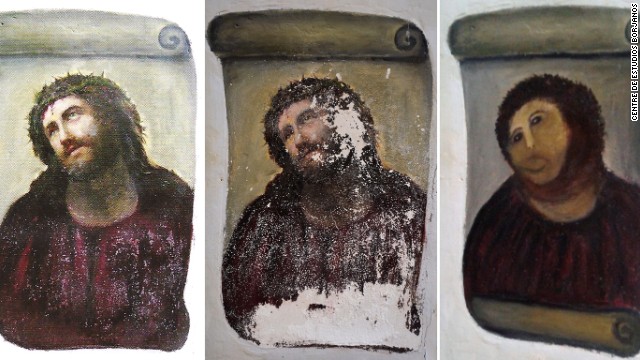
The infamous botched restoration of a fresco in Spain now known as ‘Monkey Jesus’
How do I clean a painting?
The internet is an amazing thing. You can find out how to do pretty much anything just by doing a quick Google search or finding a video on YouTube. There are plenty of ‘how to clean your painting’ videos out there- quite often involving bread– some with bizarre but ultimately not hugely harmful advice and others with DEFINITELY NEVER DO THAT stuff on, like using boiling water to correct the tension in a canvas. Just don’t. There have also been a number of high-profile botched restoration jobs. Monkey Jesus is still my favourite/least favourite but there more recently there have been a couple of polychrome sculpture disasters too. In all of these cases there is a serious problem with what has been added, but there is also a problem with things being taken away- scrubbed with wire wool or a wet cloth or cleaned of final touches.
Conservation on film
In fiction there are a wonderful number of cleaning- a-painting-gone-wrong incidents: the Mr Bean film, the old Paddington Bear, Shaun the Sheep (just a tiny aside at the end of that one when the pigs are cleaning up the house). It seems as though a lot of people know that it’s a delicate job that requires more than just enthusiasm and marmalade, but there are still people out there who get in touch with conservators and are only interested in what they should use at home. I’ve even seen websites offering DIY picture cleaning substances for sale. Going back to fiction, one of the things that bugs me about the depiction of conservation in Ghostbusters II is that Sigourney Weaver’s character is blindly carrying out a varnish removal and says something like “I’m doing well with that mixture you gave me”, as though she doesn’t understand what she’s using or why it might be working. A very wise conservator, when dealing with such an enquiry in my presence, firmly yet politely told the enquirer that it’s not about the ‘what’ it’s about the ‘how’. Of course using the correct materials and tools for the job is important but far more important is that the person wielding them knows what they’re doing and why.
One size doesn’t fit all
Importantly, conservators don’t use a ‘one size fits all’ approach to treating paintings. We are trained to look closely and assess, we research, we aim to understand what we’re dealing with and have learned what is likely to be problematic, we test, we are cautious and work in small areas, and sometimes a painting still doesn’t respond in the way that we expect, we keep abreast of new developments and share findings, in the UK we have an agreed professional code of conduct, we also know how what we are using might damage our health and so take the appropriate precautions. So step away from the wet cloth, the fresh bread, the kettle, the ‘oil paint cleaner’, and please don’t try this at home.
People often ask how I got into conservation, so here it is. I’ve always loved art, both looking at and making it. At 19 I decided getting a degree and History of Art seemed like a good way to spend the next few years, so started looking around universities at their courses. When I went to see the department at Edinburgh University I was shown the library, the seminar rooms and, down in the basement, the conservation lab. I suppose I must have been aware of ‘restoration’ but before being shown the basement lab in George Square it had never occurred to me that that was something that I might be able to do.
Early in my first term I went to meet my Director of Studies, Dr. Patsy Campbell, who it turned out was the enthusiastic keeper of the conservation lab and gave courses in the History of Conservation until her retirement in 2006. I have since met a number of other conservators who were inspired by Dr Campbell to pursue a career in conservation, both contemporaries of mine and others up to 20 years my senior. During my third or fourth year I took the History of Conservation course, as part of which we could spend some time in the conservation lab working on whatever projects were in. We also went on field trips to the National Galleries of Scotland Conservation Department and to Northumbria University’s MA Conservation of Fine Art open day. The trainee conservators there were divided into two easily identifiable groups: lab coats for those studying Works on Paper and black smocks for Oil Paintings. It was great.
Testing the water
Having studied for four years I wasn’t ready to jump into another two-year course straight away, so after graduation I went home to Manchester. I was wondering whether or not I’d have the patience to work with such tiny brushes when I was (by a rather convoluted route that I won’t go into) given the number of a person who worked at Manchester Art Gallery’s Conservation Department and was happy to accept a volunteer. This was a really lucky break since many places now won’t take a volunteer who hasn’t already been through a training programme. I went to the studios a couple of days a week and had the opportunity to spend time working with the frames conservator, a paper conservator and the paintings conservators (one of whom was a former student of Dr Campbell’s). At the time there was a big project underway in the painting department. William Etty’s hugeThe Sirens and Ulysses was lying on a specially extended table face down and in the midst of a lining reversal, which involved using a scalpel to flick off the old animal glue, which had once adhered another massive canvas to the original one, from the back of the original canvas. (If you click on the link it will take you through to a video of the project- my glue-flicking cameo is at 1:59.) It’s one of the less glamorous tasks in conservation but I was hooked.
Training
Now that I knew which discipline of conservation I wanted to pursue I was ready to spend two more years studying. I was lucky enough to get a place on the Masters programme at Northumbria. The course was intense, with Chemistry and Physics classes every week, lectures about materials, theory, museum environment management, technical examination, more art history and ethics, as well as practical projects- both real and mock-up paintings. The eight of us on the course worked on different projects and shared our experiences and discoveries.
My MA Conservation of Fine Art, Easel Paintings buddies
In the summer between the two years of teaching I did work placements in a private studio and a museum department (Manchester City Galleries again, where I was able to assist with the retouching phase of the Etty project), where all of the theory started to fall into place and my confidence really grew.
Post-training experience
Unfortunately the economic crash in 2008 coincided with my entry into the world of work, seriously reducing job opportunities in the museum sector. Nevertheless over the next couple of years I was able to gain experience in at Lancashire County Museums Service as a volunteer, Manchester City Galleries as a freelancer, and then a maternity- cover post at National Museums Liverpool. Setting up on my own has allowed me to take up the slack in some of the institutions nearby that either don’t employ any conservators due to budget restraints or whose conservators are overstretched, but also allows me to offer museum standard conservation to private owners of paintings.
Sometimes, when I tell people what I do, they say something along the lines of “I wouldn’t have the patience to work with those tiny brushes!”. Usually I just laugh- conservation is a very detail oriented occupation- but after the most recent time it happened it got me thinking. What do people imagine I do with such tiny brushes? Do they equate small brushes with some kind of exercise in fussiness when really a larger brush would be more appropriate? I was reminded of an off-hand remark in a newspaper article about cleaning Michelangelo’s David in 2004, where the original conservator resigned after her recommendation to dry dust it was rejected. The columnist reported her resignation comments and then wrote “and took her tiny brushes elsewhere”, which made her sound like an old fuss-pot. As a rule I would say that conservators like to keep things small to increase control. In paintings conservation we use tiny brushes to dot out tiny losses or certain kinds of cracks without going over onto the original paint.
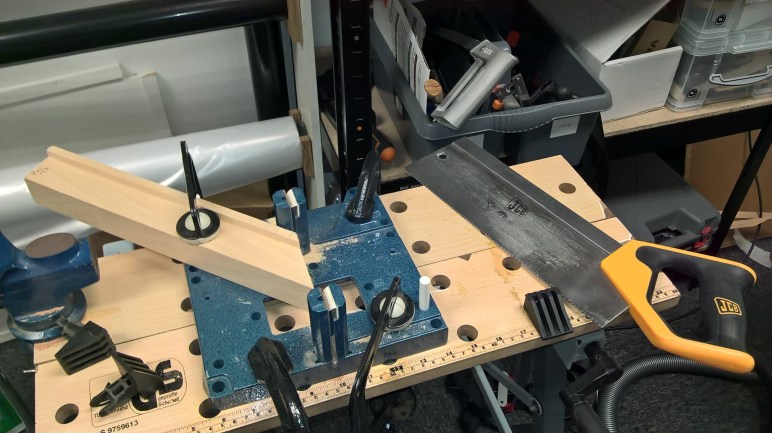
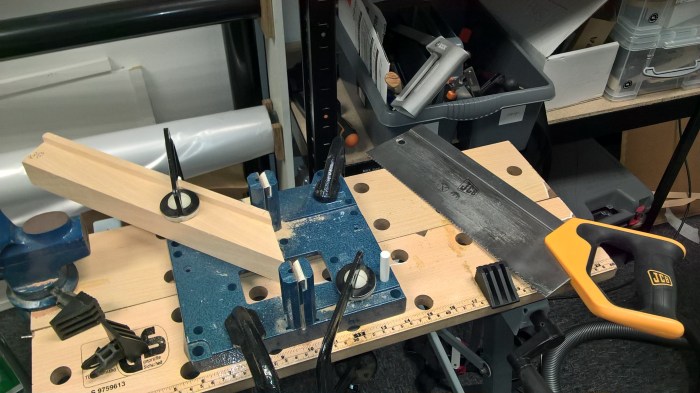
But it’s not all tiny brushes. I’ve also got a growing collection of heavier duty tools for working with wooden supports and frames.
Woodworking isn’t always what people imagine as part of my job
This week I have been making a build-up for the frame of a picture I’ve been working on. A build-up is sometimes added to the frame if the painting is sticking out at the back. I’m also adding glazing to the frame as it is an unvarnished painting with high impasto that is prone to collecting dust. The glazing plus the slip frame for spacing will mean that the original rebate just won’t be deep enough to hold the painting satisfactorily. It’s been too hot for it but I’ve been cutting lengths of wood down to size using a mitre guide and my trusty tenon saw. I can’t wait to get back to my tiny brushes.
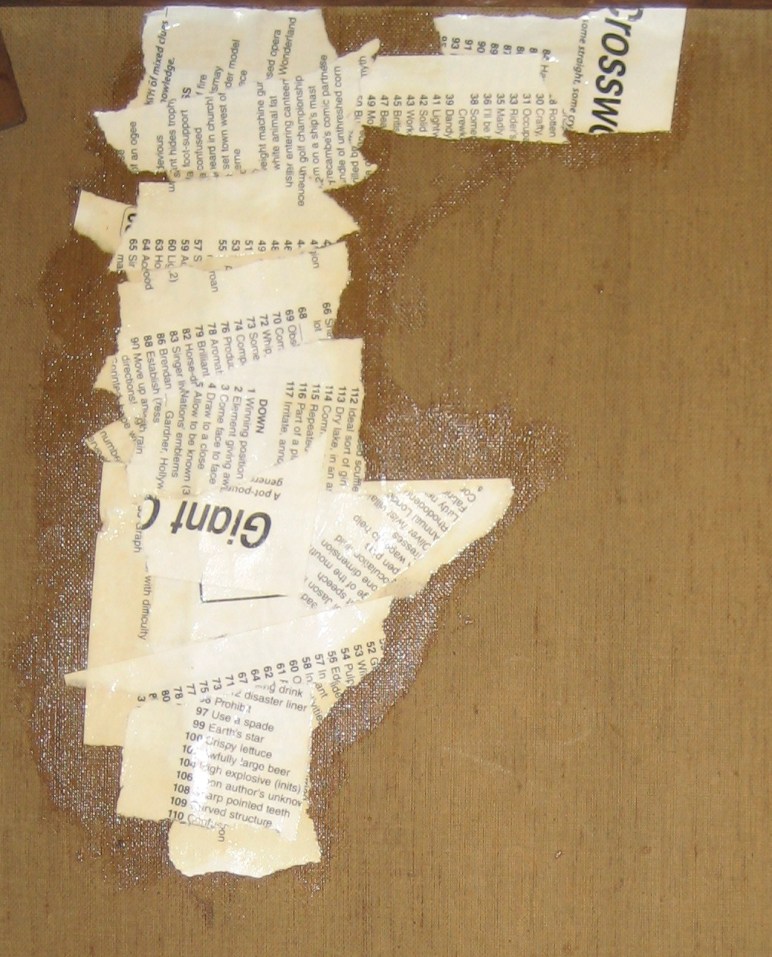
I have been working for a couple of days on a painting with an old tear. As well as having broken canvas fibres the surrounding area is distorted where the fibres have stretched before breaking. In the past someone has put on a thick paper and canvas patch to support the tear, which I’ve taken off. I’m always wary of old repairs after the time I had to remove someone’s attempt that consisted of an old crossword and lots of PVA glue. Luckily, this one hasn’t been so bad.
An amateur tear repair
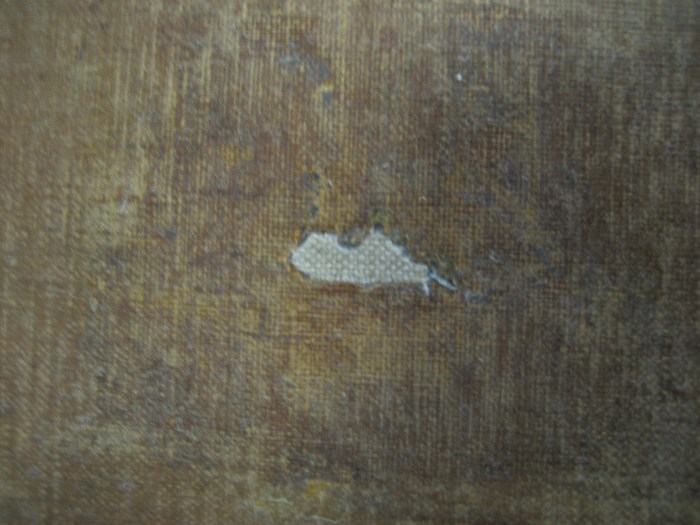
For a small tear it is usually possible to bond the broken threads before adhering a lightweight patch to give further support to the torn area. If the tear is larger it may be necessary to support the whole canvas with another piece of fabric, in a process called lining. Sometimes it isn’t possible to bring the broken threads together so I have to cut a new piece of canvas to insert into the gap. Of course, I try to keep my repairs reversible, in case they start to fail at some point in the (hopefully distant) future, by choosing suitable adhesives and documenting my treatments.
A new canvas inset to fill a hole in the original support
I was surprised to see the word ‘patina’ appear as a Daily Prompt today. It’s a very ‘conservation’ sort of a word and one that is pretty loaded. It refers to the quality that something acquires as it ages, a sort of ‘lived in’, mellow look. When that’s an oil painting it means dusty and yellow. One of the major criticisms of conservation is that we strip away patina when we clean pictures or other works of art, and take with it something that made the work of art feel more special or authentic. As I’ve previously talked about, one of the best ways to ensure that you’re not taking off something you shouldn’t is to work in a controlled way tackling surface coatings in layers rather than all at once.
My own criteria for deciding whether or not to remove a coating, and I’m sure I’m not alone, depends very much on originality. If a varnish is present that I believe to be original, which is rare, especially in museum collections, then my default position is to leave it where it is. There are a number of things that might alert you to an original varnish including the known history of the object and uneven or selective varnish application. It’s important to consider whether or not a varnish has been applied by the artist as if that is the case it has likely been applied closer to the time that the painting was finished, so may have bonded with the fresh paint beneath, making the distinction between paint layer and varnish layer blurry. The artist may also have decided to add finishing touches on top. Turner was renowned for varnishing his pictures before the paint was dry. There has also been much discussion about how much artists may have anticipated and hoped for the effects of age on their varnishes.
Dirt, for me, is less of a problem. Unless there was some kind of hugely important event that caused the dirt, it’s not usually considered to be significant to the history of the object. One item that I can think of that would fit into this category is Jackie Kennedy’s outfit worn in Dallas on the day of her husband’s assassination, which is in the collection of America’s National Archive still gruesomely soiled. It would obviously be entirely inappropriate to clean the suit but it’s significance also renders it undisplayable. Thankfully the dirt on paintings is usually far more innocuous but if left on the surface it robs the picture of depth and vibrancy, eventually making the paintings illegible and unfit for display.
There’s been a bit of rumpus on social media this week after the Philip Mould Gallery posted a video on Twitter of a painting being cleaned. The intention of the video was to say “look at this amazing person doing something really dramatic with this filthy old painting” and the conservator carrying out the treatment is experienced and, I understand, accredited but many conservators across the world feel that the treatment as shown doesn’t accurately portray the knowledge, experience and delicacy required when attempting such a task. I don’t generally like to pass judgement on a fellow conservator’s work but the, shall we say, ‘casual’ approach of the conservator did make me wince. I don’t know what he was using, it was some kind of gel, or what safety margin tests he’d carried out, but the manner in which he was using it, allowing it to dribble down onto already cleaned areas, seemed to me to be less than ideal.
Cleaning pictures is fraught with difficulty. Modern conservators hold the principle of reversibility sacrosanct, which is great when you’re putting something on but completely redundant when you’re taking something off and therein lies a problem. The original cleaning controversy was conducted through letters to the Burlington Magazine about the conservation of paintings at the National Gallery in London. Today there is a group called ArtWatch, which likes to watch out for any painting that has been ‘over-cleaned’ and show up at conservation conferences to grill the speakers. A book on the required reading of my training course called ‘The Ravished Image’ also addresses the problem of over-cleaning. Taking away layers of varnish using solvents and other cleaning agents is a delicate task and one that should not be undertaken lightly. The only way for conservators to protect themselves from allegations of improper treatment is to treat every picture with the same standard of care and ethical consideration and to rigorously document treatments and explain in the documentation the rationale behind decisions.
In the past, and possibly still today in some practices, there was a tendency to go straight for varnish removal to solve the problem of a discoloured and obscuring surface but this is not usually done any more. It is my practice to try to remove surface coatings in layers, starting with the dust and dirt (shown in the image at the top). This allows for a more controlled treatment, often requiring less mechanical action (scrubbing) than if you’re trying to take off everything at once. It also allows you to monitor the necessity of further treatment. There have been times when I’ve expected to have to do a full varnish removal treatment to make the picture legible only to find that once the dirt has been taken off the picture looks great and doesn’t need any further treatment. On other occasions the dirt has been masking a badly degraded varnish that really needs to be remedied.
I said near the top that I don’t like to pass judgement about colleagues in the field and that is because I’m acutely aware that we are all, usually with the best of intentions and current knowledge, carrying out sometimes irreversible treatments to precious objects that may in the future be derided as ignorant, barbaric and destructive. I hope not. But as long as there is someone cleaning pictures there will be someone criticising them.
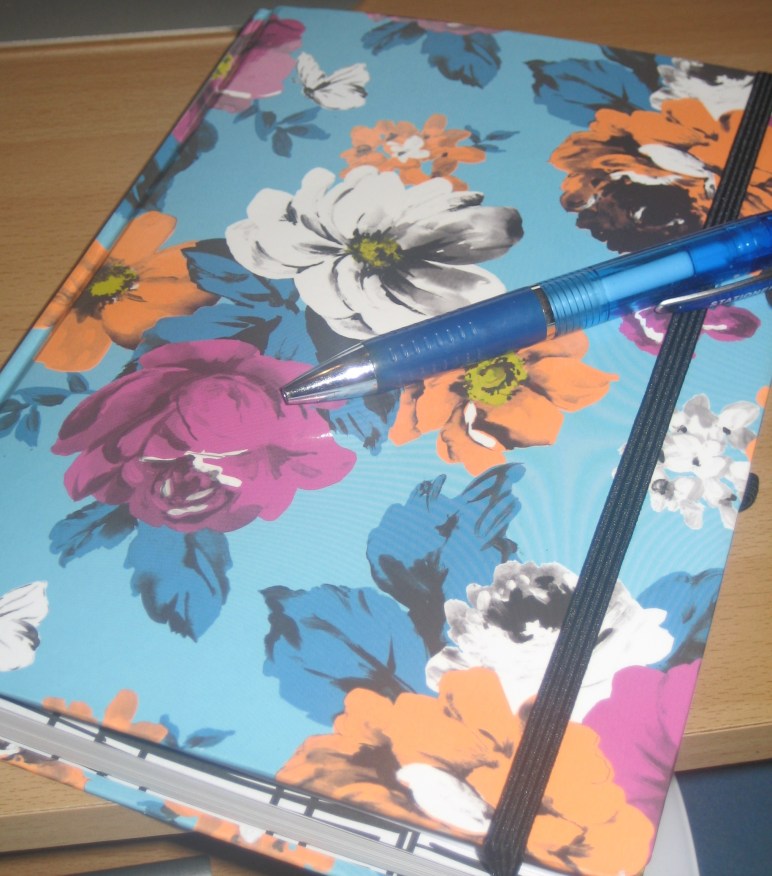
Writing reports accounts for quite a lot of my working time. There are condition reports, treatment recommendations, loan reports, treatment reports. I’m never far from my notebook when I’m working.
These reports aren’t just box-ticking (although sometimes box-ticking is exactly what’s involved) but are important records of the works at a particular time. Sometimes it’s obvious what purpose a report will serve. When a work goes out on loan for an exhibition, whether that’s between galleries or to a gallery from a private collection, we need to make a note of its condition before it travels and see how it looks when it gets there.
Other reports I write are often for the interest or information of some unknown person at an unspecified time in the future. Sometimes it can feel a bit futile, as if nobody will be interested, but actually I’m always grateful to see a previous report for a painting I’m looking at. It’s reassuring when you find that nothing much has changed, or it can narrow down a time period during which a change has occurred; it can save you time if the previous conservator has recorded something that will influence your treatment proposal.
Something I hadn’t previously considered is that there is the possibility that something I record could be more significant than I understand at the time. Recently in the news there was a story of a painting being identified as Nazi loot thanks to the detailed condition report of a museum employee during the occupation of France who recorded the presence of a small hole in the canvas. This, along with the present day conservators who have looked carefully and recorded what they’ve found and compared it to these old reports, should lead to the painting being reunited with the family that it was stolen from. Whilst I expect that most of the reports I write will be merely of interest in the future, the potential for my observations to be of greater significance will keep me motivated as I sit down to write the next batch.
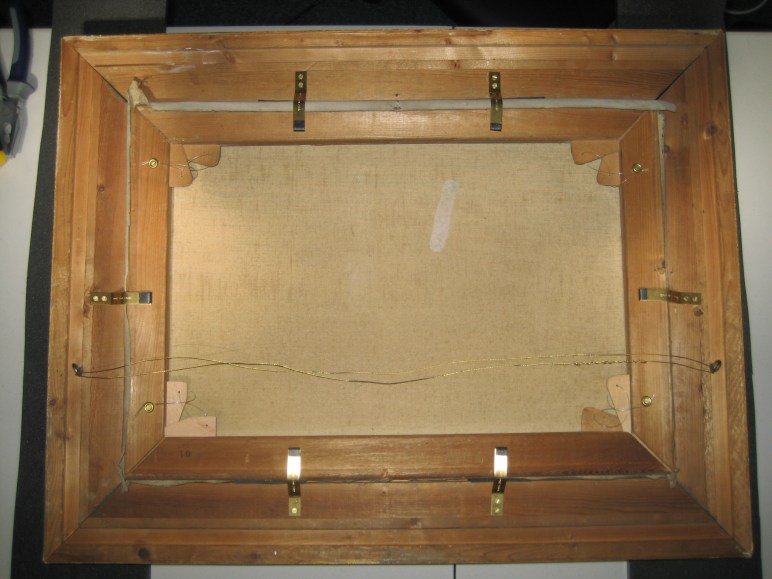
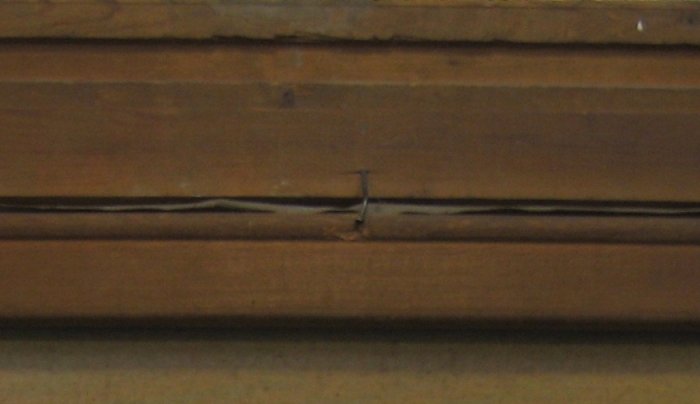
When a picture comes in to me for conservation treatment one of the first things I have to do is get it out of its frame if it has one. This may sound straightforward but it can be one of the most frustrating and potentially dangerous jobs, depending on the approach the previous framer has taken. Occasionally in older paintings still in their original frames the framer has made wooden buttons that are screwed to the frame and can be turned the let the painting out (I love these) but unfortunately panel pins are far and away the most common method of securing an oil painting in its frame. Sometimes they have been knocked into the frame and bent around the back of the painting (forgivable), sometimes knocked right through the stretcher and into the rebate (awful). Sometimes the frame isn’t even a complete object in its own right and is simply pinned to the outside edges of the stretcher (nightmare). Once I’ve finally managed to remove whatever rusty nails have been holding the picture in I sometimes find that the picture still won’t come out. Maybe it’s been put into the frame too soon after varnishing, maybe there’s another sneaky pin somewhere…
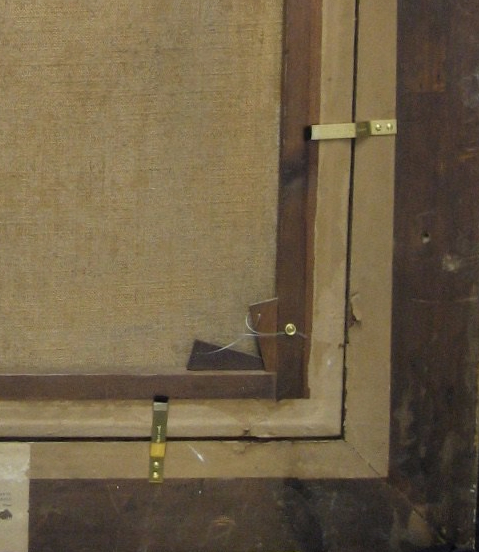
Whatever torment the previous framer has devised I can usually do my best to ensurethat the next person to take the picture out isn’t cursing me. One of the first things to do is clean the rebate and line it with cushioned tape to make a softer interface between the frame and the front of the painting. Then come the fixings. There are a number of ways to hold a picture in a frame but my favoured method uses brass strips. These little strips can be bent quite easily to fit the profile of the painting in the rebate and they have a little bit of flexibility to accommodate movement due to environmental fluctuations. They are then secured with brass screws, which can be removed without anyone having to break a sweat.